Color grading
This article needs additional citations for verification. (April 2017) |

Color grading is the process of improving the appearance of an image for presentation in different environments on different devices. Various attributes of an image such as contrast, color, saturation, detail, black level, and white point may be enhanced whether for motion pictures, videos, or still images. Color grading and color correction are often used synonymously as terms for this process and can include the generation of artistic color effects through creative blending and compositing of different images. Color grading is generally now performed in a digital process either in a controlled environment such as a color suite, or in any location where a computer can be used in dim lighting.
The earlier photochemical film process, referred to as color timing, was performed at a film lab during printing by varying the intensity and color of light used to expose the rephotographed image. Since, with this process alone, the user was unable to immediately view the outcome of their changes, the use of a Hazeltine color analyzer was common for viewing these modifications in real time.
Color timing[]
Color timing is used in reproducing film elements. "Color grading" was originally a lab term for the process of changing color appearance in film reproduction when going to the answer print or release print in the film reproduction chain. By the late 2010s, this film grading technique had become known as color timing and still involved changing the duration of exposure through different filters during the film development process. Color timing is specified in printer points which represent presets in a lab contact printer where 7-12 printer points represent one stop of light. The number of points per stop varied based upon negative or print stock and different presets at film labs.
In a film production, the creative team would meet with the “lab timer” who would watch a running film and make notes dependent upon the team's directions. After the session, the timer would return to the lab, and put the film negative on a device (the Hazeltine) which had preview filters with a controlled backlight, and pick exact settings of each printer point for each scene. These settings were then punched onto a paper tape and fed to the high-speed printer where the negative was exposed through a backlight to a print stock. Filter settings were changed on the fly to match the printer lights that were on the paper tape. For complex work such as visual effects shots, "” running through combinations of filters were sometimes processed to aid the choice of the correct grading.
This process is used wherever film materials are being reproduced.
Telecine[]
With the advent of television, broadcasters quickly realised the limitations of live television broadcasts and they turned to broadcasting feature films from release prints directly from a telecine. This was before 1956 when Ampex introduced the first Quadruplex videotape recorder (VTR) VRX-1000. Live television shows could also be recorded to film and aired at different times in different time zones by filming a video monitor. The heart of this system was the kinescope, a device for recording a television broadcast to film.[1]
The early telecine hardware was the "film chain" for broadcasting from film and utilized a film projector connected to a video camera. As explained by in American Cinematographer Magazine, "The telecine didn't truly become a viable post-production tool until it was given the ability to perform colour correction on a video signal."[2]
How telecine coloring works[]
In a cathode-ray tube (CRT) system, an electron beam is projected at a phosphor-coated envelope, producing a spot of light the size of a single pixel. This beam is then scanned across a film frame from left to right, capturing the "vertical" frame information. Horizontal scanning of the frame is then accomplished as the film moves past the CRT's beam. Once this photon beam passes through the film frame, it encounters a series of dichroic mirrors which separate the image into its primary red, green and blue components. From there, each individual beam is reflected onto a photomultiplier tube (PMT) where the photons are converted into an electronic signal to be recorded to tape.
In a charge-coupled device (CCD) telecine, a white light is shone through the exposed film image onto a prism, which separates the image into the three primary colors, red, green and blue. Each beam of colored light is then projected at a different CCD, one for each color. The CCD converts the light into an electronic signal, and the telecine electronics modulate these into a video signal that can then be color graded.
Early color correction on Rank Cintel MkIII CRT telecine systems was accomplished by varying the primary gain voltages on each of the three photomultiplier tubes to vary the output of red, green and blue. Further advancements converted much of the color-processing equipment from analog to digital and then, with the next-generation telecine, the Ursa, the coloring process was completely digital in the 4:2:2 color space. The Ursa Gold brought about color grading in the full 4:4:4 color space.[2]
Color correction control systems started with the Rank Cintel TOPSY (Telecine Operations Programming SYstem) in 1978.[1] In 1984 Da Vinci Systems introduced their first color corrector, a computer-controlled interface that would manipulate the color voltages on the Rank Cintel MkIII systems. Since then, technology has improved to give extraordinary power to the digital colorist. Today there are many companies making color correction control interfaces including Da Vinci Systems, Pandora International, Pogle and more.
Some telecines are still in operation in 2018.
Color correction[]
Some of the main artistic functions of color correction (digital color grading) include:[1]
- Reproducing accurately what was shot
- Compensating for variations in the material (i.e., film errors, white balance, varying lighting conditions)
- Compensating for the intended viewing environment (dark, dim, bright surrounds)
- Optimizing base appearance for inclusion of special visual effects
- Establishing a desired artistic 'look'
- Enhancing and/or altering the mood of a scene — the visual equivalent to the musical accompaniment of a film; compare also film tinting
Note that some of these functions must be prioritized over others; for example, color grading may be done to ensure that the recorded colors match those of the original scene, whereas other times, the goal may instead be to establish a very artificial stylized look.
Traditionally, color grading was done towards practical goals. For example, in the film Marianne, grading was used so that night scenes could be filmed more cheaply in daylight. Secondary color correction was originally used to establish color continuity; however, the trend today is increasingly moving towards creative goals such as improving the aesthetics of an image, establishing stylized looks, and setting the mood of a scene through color. Due to this trend, some colorists suggest the phrase "color enhancement" over "color correction".
Primary and secondary color grading[]
Primary color grading affects the whole image by providing control over the color density curves of red, green, blue color channels, across the entire frame. Secondary correction can isolate a range of hue, saturation and brightness values to bring about alterations in hue, saturation and luminance only in that range, allowing the grading of secondary colors, while having a minimal or usually no effect on the remainder of the color spectrum.[1] Using digital grading, objects and color ranges within a scene can be isolated with precision and adjusted. Color tints can be manipulated and visual treatments pushed to extremes not physically possible with laboratory processing. With these advancements, the color correction process has become increasingly similar to well-established digital painting techniques, ushering forth a new era of digital cinematography.
Masks, mattes, power windows[]
The evolution of digital color grading tools has advanced to the point where the colorist can use geometric shapes (such as mattes or masks in photo software such as Adobe Photoshop) to isolate color adjustments to specific areas of an image. These tools can highlight a wall in the background and color only that wall, leaving the rest of the frame alone, or color everything but that wall. Subsequent color correctors (typically software-based) have the ability to use spline-based shapes for even greater control over isolating color adjustments. Color keying is also used for isolating areas to adjust.
Inside and outside of area-based isolations, digital filtration can be applied to soften, sharpen or mimic the effects of traditional glass photographic filters in nearly infinite degrees.
Motion tracking[]
When trying to isolate a color adjustment on a moving subject, the colorist traditionally would have needed to manually move a mask to follow the subject. In its most simple form, motion tracking software automates this time-consuming process using algorithms to evaluate the motion of a group of pixels. These techniques are generally derived from match moving techniques used in special effects and compositing work.
Digital intermediate[]
The evolution of the telecine device into film scanning allowed the digital information scanned from a film negative to be of sufficient resolution to transfer back to film. In the early 1990s, Kodak developed the Cineon Film System to capture, manipulate, and record back to film and they called this the “Digital Intermediate”. This term stuck. The first digital intermediate of any form was the Cinesite restoration of “Snow White and The Seven Dwarves” in 1993. (Previously, in 1990, for Rescuers Down Under, the Disney CAPS system had been used to scan artwork, color and composite it, and then record it to film, but this was also intermixed with a traditional lab development process over a length of time]
In the late 1990s, the films Pleasantville and O Brother, Where Art Thou? advanced the technology to the point that the creation of a digital intermediate was practical, which greatly expanded the capabilities of the digital telecine colorist in a traditionally film-oriented world. Since 2010, almost all feature films have gone through the DI process, while manipulation through photochemical processing is rare or used on archival films.
In Hollywood, O Brother, Where Art Thou? was the first film to be wholly digitally graded. The negative was scanned with a Spirit DataCine at 2K resolution, then colors were digitally fine-tuned using a Pandora MegaDef color corrector on a Virtual DataCine. The process took several weeks, and the resulting digital master was output to film again with a Kodak laser recorder to create a master internegative.
Modern motion picture processing typically uses both digital cameras and digital projectors and calibrated devices are essential to predict whether the appropriate colors are appearing.
Hardware-based versus software-based systems[]

In early use, hardware-based systems (da Vinci 2K, Pandora International MegaDEF, etc.) have historically offered better performance but a smaller feature set than software-based systems. Their real time performance was optimised to particular resolution and bit depths, as opposed to software platforms using standard computer industry hardware that often trade speed for resolution independence, e.g. Apple's Color (previously Silicon Color Final Touch), , Adobe SpeedGrade and . While hardware-based systems always offer real-time performance, some software-based systems need to pre-render as the complexity of the color grading increases. On the other hand, software-based systems tend to have more features such as spline-based windows/masks and advanced motion tracking.
The line between hardware and software no longer exists as many software-based color correctors (e.g. Pablo , , , Autodesk Lustre, and FilmLight's Baselight) use multi processor workstations and a GPU (graphics processing unit) as a means of hardware acceleration. As well, some newer software-based systems use a cluster of multiple parallel GPUs on the one computer system to improve performance at the very high resolutions required for feature film grading. e.g. Blackmagic Design's DaVinci Resolve. Some color grading software like Synthetic Aperture's Color Finesse runs solely as software and will even run on low-end computer systems. High-speed RAID arrays are an essential part of the process for all systems.
Hardware[]
Hardware systems are no longer common because of the price/performance of software systems. The control panels are placed in a color suite for the colorist to operate the telecine remotely.
- Many[citation needed] telecines were controlled by a Da Vinci Systems color corrector 2k or 2k Plus.
- Other hardware systems are controlled by Pandora Int.'s Pogle, often with either a MegaDEF, Pixi, or Revolution color grading system.
- For some real-time systems used in "linear" editing, color grading systems required an edit controller. The edit controller controls the telecine and a VTR(s) or other recording/playback devices to ensure frame accurate film frame editing. There are a number of systems which can be used for edit control. Some color grading products such as Pandora Int.'s Pogle have a built-in edit controller. Otherwise, a separate device such as Da Vinci Systems' TLC edit controller would be used.
- Older systems are: Renaissance, Classic analog, Da Vinci Systems's: The Whiz (1982) and 888; The Corporate Communications's System 60XL (1982–1989) and Copernicus-Sunburst; Bosch Fernseh's FRP-60 (1983–1989); Dubner (1978–1985?), Cintel's TOPSY (1978), Amigo (1983), and ARCAS (1992) systems. All of these older systems work only with standard-definition 525 and 625 video signals, and are considered near obsolete today.
Organizations[]
In 2016, an international professional organization for film colorists, the , was founded at the NAB Show in Las Vegas.
Gallery[]
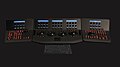
Blackmagic DaVinci Resolve Advanced Panel

Da Vinci Joy ball control panel
Da Vinci 2k Display

Pogle control panel and soft knob display

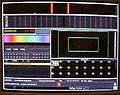
Pogle SGI monitor display
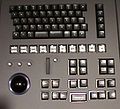
Pogle control panel and keyboard

Pogle control panel joyballs

Pogle MegaDEF: Two PiXi systems with a multiplexer rack

Pogle control rack, CPU and Telecine interface

Nucoda with Precision Panel and Dolby Reference Monitor

DFT Scanity
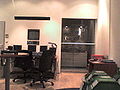
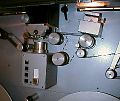
A Shadow Telecine in a color correction suite

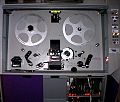
SDC-2000 Spirit DataCine Film Deck
Bosch Fernseh FDL 60 Telecine Film Deck and Lens Gate

Rank Cintel Mark 3
Cintel URSA Diamond


See also[]
References[]
- ^ Jump up to: a b c d Kallenberger, Richard H., Cvjetnicanin, George D. (1994). Film into Video: A Guide to Merging the Technologies. Focal Press. ISBN 0-240-80215-2
- ^ Jump up to: a b Holben, Jay (May 1999). "From Film to Tape" American Cinematographer Magazine, pp. 108–122.
External links[]
This article's use of external links may not follow Wikipedia's policies or guidelines. (March 2014) |
- Colorist Society International (CSI) - The Professional Body for Colourists
- The TKColorist Internet Group[permanent dead link]
- Why Do You Need Color Correction, video by Terence Curren, senior colorist at Apha Dogs, Inc.
- What Can a Colorist Learn from a Director of Photography? Interview with Ellie Ann Fenton
- Cinematic Color: From Your Monitor to the Big Screen
- A Walk By The Digital Film Colorist… Revolution?
- Color
- Film and video technology
- Filmmaking occupations