Battle of Ankara
| Battle of Ankara | |||||||
|---|---|---|---|---|---|---|---|
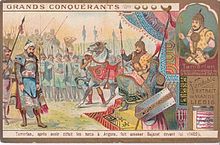
 Battle of Ankara, Mughal illustration | |||||||
| |||||||
| Belligerents | |||||||
|
Timurid Empire Aq Qoyunlu Germiyanids |
Ottoman Empire Principality of Kastrioti Moravian Serbia District of Branković Anatolian beyliks and Black Tatars[a] | ||||||
| Commanders and leaders | |||||||
|
Timur Shah Rukh Khalil Sultan Miran Shah Sultan Husayn Tayichiud Muhammad Sultan Mirza Pir Muhammad Shah-i-Shahan Uthman Beg[1] Yakup II of Germiyan[2] |
Bayezid I (POW) Süleyman Çelebi Mehmed Çelebi Musa Çelebi (POW) Mustafa Çelebi (POW) Stefan Lazarević Vuk Lazarević Đurađ Branković Gjon Kastrioti Koja Zaharia Dhimitër Jonima | ||||||
| Units involved | |||||||
| Unknown | Ottoman ghazi, Janissaries, and Balkan Christian vassals | ||||||
| Strength | |||||||
| 140,000[3] | 85,000[4]-120,000[5] | ||||||
The Battle of Ankara or Angora was fought on 20 July 1402 at the Çubuk plain near Ankara, between the forces of the Ottoman Sultan Bayezid I and the Emir of the Timurid Empire, Timur. The battle was a major victory for Timur, and it led to the Ottoman Interregnum.[6]
Background[]
Timur, a Turco-Mongol from Transoxiana (now Uzbekistan), had built an empire in Central Asia over the years, and became the most powerful ruler in Central Asia since Genghis Khan.[7] He sought to rebuild the once great Mongol Empire.[8] In the 1380s and 1390s, he invaded and conquered parts of Persia (including Armenia, Azerbaijan and Upper Mesopotamia), ravaged southern Russia and Ukraine (1395–96), and invaded India (1398).[9] Although there had been tensions between the Ottomans and Mongols, nothing would warrant a war, until Bayezid demanded tribute from an emir loyal to Timur, which he understood to be personal and a reason for war.[10] In 1400–01 Timur took Sivas from the Ottomans, parts of Syria from the Mamluks, and next directed towards Anatolia.[10]
Meanwhile, in 1402, the Ottomans had been campaigning in Europe. Bayezid broke off the blockade of Constantinople and marched to Ankara after Timur again moved his army to the southeast in the summer of 1402.[10]
Troops[]
It is estimated that the Timurid army counted 140,000,[4] mostly cavalry, and also 32 war elephants.[10] Bayezid's army numbered 85,000.[4][10] Historical sources exaggerated the number of troops to unrealistic proportions: Ahmad ibn Arabshah claimed 800,000 Timurid troops, while a German witness claimed 1.6 million, for instance.[11]
The Ottoman force included contingents under his sons, Ghazis, Janissaries, Anatolian Muslim vassals,[12] and various European (Balkan Christian[12]) vassals.[13] Among Serbian vassals participating were Stefan Lazarević, Vuk Lazarević, Đurađ Branković and his brother Grgur Branković,[13] and among Albanian were Koja Zakarija, Demetrius Jonima, Gjon Kastrioti, and probably .[14] Christian vassals that did not participate include Zetan Konstantin Balšić.[14] A quarter of the Ottoman troops were recently conquered Tatars.[10]
Battle positioning[]
Bayezid reluctantly withdrew his forces from the blockade of Constantinople and marched them through the midsummer heat. When they arrived, they were tired and thirsty, but were allowed no time to rest or recuperate. Bayezid was advised by his generals to take up defensive positions and, when Timur's forces pushed back the Ottomans, to withdraw into the mountains and force Timur to break ranks and attempt to hunt the Ottomans in their own terrain during the midsummer heat. Bayezid instead chose to take an offensive stance and marched eastward. Advancing Ottoman scouts found no traces of the Timurids, who secretly marched southwest, rested, and were situated to the rear of the Ottomans. The Timurids encamped in the same locations that the Ottomans had previously occupied, making use of abandoned tents and water sources.[15]
In the Timurid army, Timur commanded the centre, his sons Miran and Rukh the right and left, respectively, and his grandsons the vanguard.[10]
In the Ottoman army, Bayezid commanded the centre with Janissaries, his son Suleyman the left flank with the best troops, Stefan Lazarević the right with the Balkan troops, and his son Mehmed the rear guard.[10]
Battle[]
This section needs additional citations for verification. (December 2020) |

The battle began with a large-scale attack from the Ottomans, countered by swarms of arrows from the Timurid horse archers. Several thousand were killed and many surrendered to Timur. Stefan Lazarević and his knights together with Wallachian forces successfully fought off the Timurid assaults and cut through the Mongol ranks three times. Each time Stefan advised Bayezid to break out with him, Bayezid declined to do so. But the Serbians managed to save one of Bayezid's sons and the treasury from the Mongols and made their way to Constantinople. The Serbian troops wore heavy black plate armour which was very effective against the Timurid arrows. Timur admired the Serbian troops who according to him "fight like lions". During the battle the main water supply of both armies, Çubuk creek, was diverted to an off-stream reservoir near the town of Çubuk by Timur, which left the Ottoman army with no water. The final battle took place at Catal hill, dominating the Çubuk valley. The Ottoman army, both thirsty and tired, was defeated, though Bayezid managed to escape to the nearby mountains with a few hundred horsemen. However, Timur had the mountains surrounded and, heavily outnumbering Bayezid, soon captured him. He died in captivity three months later. Already heavily outnumbered, the Ottoman army was further weakened by the desertion of the Black Tatars and the Sipahis from the Anatolian beyliks, who left Bayezid's side and joined Timur's forces.[16]
Aftermath[]
After the battle, Timur moved through western Anatolia to the Aegean coast, where he besieged and took the city of Smyrna, a stronghold of the Christian Knights Hospitalers.[17][18] The battle was catastrophic for the Ottoman state, fracturing what remained and bringing almost total collapse of the empire. This resulted in a civil war among Bayezid's sons. The Ottoman civil war continued for another 11 years (1413) following the Battle of Ankara.
The battle is also significant in Ottoman history as being the only time a Sultan was captured in person.
Notes[]
- ^ Anatolian Beyliks and Black Tatars defected to Timurid side during course of the battle.
References[]
- ^ Facts On File, Incorporated (2009). Encyclopedia of the Peoples of Africa and the Middle East. Infobase Publishing. p. 31. ISBN 9781438126760.
- ^ Yaşar Yüce; Ali Sevim (1991). Türkiye tarihi (in Turkish). 1. İstanbul: AKDTYKTTK Yayınları. p. 226.
- ^ Nicolle 1983, p. 29.
- ^ Jump up to: a b c Nicolle 1983, p. 29
[t]he sizes of the two armies are reliably estimated at 140,000 on Timur's side and no more than 85,000 under Sultan Bayezid I
- ^ Creasy 1878, p. 47.
- ^ Creasy 1878, p. 52-55.
- ^ Tucker 2010, p. 139.
- ^ Manz 1998, p. 25.
- ^ Tucker 2010, pp. 139–140.
- ^ Jump up to: a b c d e f g h Tucker 2010, p. 140.
- ^ Edward Gibbon; Henry Hart Milman (1899) The History of the Decline and Fall of the Roman Empire Vol. 6, Peter Fenelon New York: Collier; p. 263
- ^ Jump up to: a b Kafadar 1996, p. 18.
- ^ Jump up to: a b Fine 1994, p. 499.
- ^ Jump up to: a b Fine 1994, p. 422.
- ^ Kinross 1977, p. 74.
- ^ Tucker 2010, p. 141.
- ^ Goody 2004, p. 53.
- ^ Nicholson 2001, p. 54.
Sources[]
- Creasy, Sir Edward Shepherd (1878). History of the Ottoman Turks, from the beginning of their empire to the present time. New York, Holt.
- Dahmus, Joseph Henry (1983). "Angora". Seven Decisive Battles of the Middle Ages. Burnham Incorporated Pub.
- Fine, John Van Antwerp Jr. (1994) [1987]. The Late Medieval Balkans: A Critical Survey from the Late Twelfth Century to the Ottoman Conquest. University of Michigan Press. ISBN 978-0-472-08260-5.
- Goody, Jack (2004). Islam in Europe. Polity Press.53
- Grousset, René (1970). The Empire of the Steppes: A History of Central Asia. Rutgers University Press. ISBN 978-0-8135-1304-1.
- Kafadar, Cemal (1996). Between Two Worlds: The Construction of the Ottoman State. University of California Press. pp. 18–. ISBN 978-0-520-20600-7.
- Kastritsis, Dimitris (2007). The Sons of Bayezid: Empire Building and Representation in the Ottoman Civil War of 1402-13. BRILL. ISBN 978-90-474-2247-1.
- Kinross, Patrick Balfour Baron (1977). The Ottoman Centuries: The Rise and Fall of the Turkish Empire. Morrow. ISBN 978-0-688-03093-3.
- Manz, Beatrice Forbes (1998). "Temür and the Problem of a Conqueror's Legacy". Journal of the Royal Asiatic Society. Third Series. Cambridge University Press. 8 (1 (Apr)): 21–41. doi:10.1017/S1356186300016412.
- Nicholson, Helen J. (2001). The Knights Hospitaller. Boydell Press.
- Nicolle, David (1983). Armies of the Ottoman Turks 1300–1774. Bloomsbury USA. ISBN 978-0-85045-511-3.
- Pears, Edwin (1923). The Ottoman Turks to the Fall of Constantinople. The Cambridge Medieval History Vol. IV: The Eastern Roman Empire 717-1453. Cambridge University Press. pp. 653–705.
- Tucker, Spencer (2010). "Battle of Ankara". Battles that Changed History: An Encyclopedia of World Conflict. One. ABC-CLIO. pp. 139–141. ISBN 978-1-59884-429-0.
- Journals
- Craig, Simon (2002). "Battle of Ankara: Collision of Empires". Military History. 19 (3): 58–65.
- Knobler, Adam (1995). "The Rise of Tīmūr and Western Diplomatic Response, 1390–1405". Journal of the Royal Asiatic Society. Third Series. 5 (3): 341–349. doi:10.1017/S135618630000660X.
- Lopandić, Duško (2011). "Битка код Ангоре" [Battle of Angora]. Политикин Забавник. 3101.
- Şenlen, Sıla (2015). "Ankara Savaşı ve I. Sultan Bayezid'in Timurlenk'e Esir Düşmesinin Sahneye Yansıması" [Dramatic Representation of the Battle of Ankara and Bayezid I’s Captivation by Tamerlane]: 123–133. doi:10.1501/OTAM_0000000300. Cite journal requires
|journal=(help)
External links[]
- "Ankara, Battle of" in The New Encyclopædia Britannica. Chicago: Encyclopædia Britannica Inc., 15th edn., 1992, Vol. 1, p. 423.
| show |
|---|

| show Authority control |
|---|
Coordinates: 39°52′00″N 32°52′00″E / 39.8667°N 32.8667°E

- Battles involving the Ottoman Empire
- Battles of the Byzantine–Ottoman wars
- Battles involving Albania
- Battles involving Serbia in the Middle Ages
- Battles in medieval Anatolia
- Conflicts in 1402
- 1402 in the Ottoman Empire
- Ottoman Interregnum
- Battles of Timur
- History of Ankara Province