The Adventure of the Dancing Men
| "The Adventure of the Dancing Men" | |
|---|---|
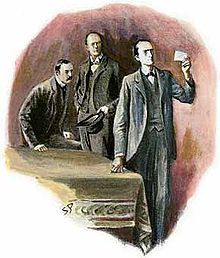 Holmes examining the drawing, 1903 illustration by Sidney Paget in The Strand Magazine | |
| Author | Arthur Conan Doyle |
| Original title | "The Dancing Men" |
| Series | The Return of Sherlock Holmes |
| Publication date | December 1903 |
The Adventure of the Dancing Men is a Sherlock Holmes story written by Sir Arthur Conan Doyle as one of 13 stories in the cycle published as The Return of Sherlock Holmes in 1905. It was first published in The Strand Magazine in the United Kingdom in December 1903, and in Collier's in the United States on 5 December 1903.
Doyle ranked "The Adventure of the Dancing Men" third in his list of his twelve favorite Holmes stories.[1] This is one of only two Sherlock Holmes short stories where Holmes' client dies after seeking his help. The other is "The Five Orange Pips", part of The Adventures of Sherlock Holmes. Holmes's solution to the riddle of the dancing men rests on reasoning that closely resembles that of Legrand in Poe's "The Gold Bug."
The original title was "The Dancing Men," when it was published as a short story in The Strand Magazine in December 1903.[2]
Plot[]
The story begins when Hilton Cubitt of Ridling Thorpe Manor in Norfolk visits Sherlock Holmes and gives him a piece of paper with the following mysterious sequence of stick figures.
Cubitt explains to Holmes and Dr. Watson that he has recently married an American woman named Elsie Patrick. Before the wedding, she had asked her husband-to-be never to ask about her past, as she had had some "very disagreeable associations" in her life, although she said that there was nothing that she was personally ashamed of. Their marriage had been a happy one until the messages began to arrive, first mailed from the United States and then appearing in the garden.
The messages had made Elsie very afraid but she did not explain the reasons for her fear, and Cubitt insisted on honoring his promise not to ask about Elsie's life in the United States. Holmes examines all of the occurrences of the dancing figures, and they provide him with an important clue—he realizes that they form a substitution cipher and cracks the code by frequency analysis. The last of the messages causes Holmes to fear that the Cubitts are in immediate danger.
Holmes rushes to Riding Thorpe Manor and finds Cubitt dead of a bullet to the heart and his wife gravely wounded from a gunshot to the head. Inspector Martin of the Norfolk Constabulary believes that it is a murder-suicide attempt; Elsie is the prime suspect. But Holmes, after noting some inconsistencies in that theory, proves that there is a third person involved.
Holmes writes a message—in dancing figure characters—and has it delivered to a lodger at a nearby farm. While waiting for the result of this message, Holmes explains to Watson and Inspector Martin how he cracked the code of the dancing figures. The last message, which caused Holmes and Watson to rush to Norfolk, read "ELSIE PREPARE TO MEET THY GOD".


The lodger, Abe Slaney, another American, unaware that Elsie is gravely wounded, arrives at Ridling Thorpe Manor and is seized as he comes through the door. Holmes had sent for Slaney using the dancing men, knowing that Slaney would believe the message is from Elsie. Slaney reveals that he had been engaged to Elsie, the daughter of the Chicago crime boss whom Slaney works for, and that she had fled to escape her old life. Slaney had come to England to get her back. When Slaney and Elsie were speaking through a window, Cubitt had appeared and shots were exchanged; Cubitt was killed and Slaney had fled. Apparently, Elsie then shot herself. Slaney is arrested and sentenced to hang, but his sentence is reduced to penal servitude because Cubitt had fired the first shot. Elsie recovers from her injuries, and spends her life helping the poor and administering her late husband's estate.
Publication history[]
The story was published in the UK in The Strand Magazine in December 1903, and in the US in Collier's on 5 December 1903.[3] It was published with seven illustrations by Sidney Paget in the Strand, and with six illustrations by Frederic Dorr Steele in Collier's.[4] It was included in the short story collection The Return of Sherlock Holmes,[4] which was published in the US in February 1905 and in the UK in March 1905.[5]
Adaptations[]
Film and television[]
- Eille Norwood starred as Holmes in a 1923 short film adapted from the story as part of the Stoll film series.[6]
- The 1943 film Sherlock Holmes and the Secret Weapon, starring Basil Rathbone as Holmes, is credited as an adaptation of "The Dancing Men," but the only element of Doyle's story to be used is the dancing men code. The plot involves Holmes and Professor Moriarty, in a World War II setting, racing to find the pieces of a new bomb sight.
- "The Dancing Men" was adapted for the second episode of the second season of the 1965–68 TV series Sherlock Holmes starring Peter Cushing as Holmes.[7]
- "The Dancing Men" was adapted for the second episode of the 1984 TV series The Adventures of Sherlock Holmes starring Jeremy Brett. In this adaptation, the location of Ridling Thorpe Manor is moved from Norfolk to Derbyshire.[8]
- "The Dancing Men" inspired the eleventh episode of the 1999 animated TV series Sherlock Holmes in the 22nd Century.
- "The Adventure of Henry Baskerville and a Dog", an episode of the NHK puppetry television series Sherlock Holmes is based on Hound of the Baskervilles and "The Dancing Men". In it, Holmes deciphers the code found in the school in parallel with investigating the real figure of "Monster Dog".
- In the BBC television series Sherlock:
- "The Dancing Men" inspired the second episode of series 1, entitled "The Blind Banker", where ciphers are a prominent feature.
- "The Dancing Men" case itself is directly portrayed at the end of the third and final episode of series 4, entitled "The Final Problem", where the identical "AM HERE ABE SLANEY" cipher is shown.
- In the 2018 movie Batman: Gotham by Gaslight, Bruce, while preparing to escape prison, smuggles out a note written in the Dancing Men code. While containing mistakes, it appears to be a legitimate message asking Alfred to prepare his gear and transport.[9]
Radio[]
- A radio adaptation aired as an episode of the American radio series The Adventures of Sherlock Holmes. The episode was adapted by Edith Meiser and aired on 20 April 1931, with Richard Gordon as Sherlock Holmes and Leigh Lovell as Dr. Watson.[10] A remake of the script aired on 9 May 1936 (with Gordon as Holmes and Harry West as Watson).[11]
- Edith Meiser also adapted the story as an episode of the American radio series The New Adventures of Sherlock Holmes, with Basil Rathbone as Holmes and Nigel Bruce as Watson, that aired on 1 December 1940.[12]
- Michael Hardwick adapted the story as a radio adaptation which aired on BBC Radio 2 in June 1969 as part of the 1952–1969 radio series starring Carleton Hobbs as Holmes and Norman Shelley as Watson, with John Bentley as Abe Slaney.[13]
- "The Dancing Men" was dramatised for BBC Radio 4 in 1993 by Bert Coules as part of the 1989–1998 radio series starring Clive Merrison as Holmes and Michael Williams as Watson. It featured Peter Tuddenham as Inspector Martin and Christopher Good as Hilton Cubitt.[14]
- The story was adapted as a 2007 episode of The Classic Adventures of Sherlock Holmes, a series on the American radio show Imagination Theatre, starring John Patrick Lowrie as Holmes and Lawrence Albert as Watson, with Stephan Weyte as Hilton Cubitt and Frank Buxton as Inspector Martin.[15]
References[]
- Notes
- ^ Temple, Emily (22 May 2018). "The 12 Best Sherlock Holmes Stories, According to Arthur Conan Doyle". Literary Hub. Retrieved 6 January 2019.
- ^ Sir Arthur Conan Doyle (1998). David Stuart Davies (ed.). The Best of Sherlock Holmes. Wordsworth Classics. p. 250.
- ^ Smith (2014), p. 119.
- ^ a b Cawthorne (2011), p. 115.
- ^ Cawthorne (2011), p. 110.
- ^ Eyles, Alan (1986). Sherlock Holmes: A Centenary Celebration. Harper & Row. p. 132. ISBN 0-06-015620-1.
- ^ Eyles, Alan (1986). Sherlock Holmes: A Centenary Celebration. Harper & Row. p. 138. ISBN 0-06-015620-1.
- ^ Eyles, Alan (1986). Sherlock Holmes: A Centenary Celebration. Harper & Row. p. 141. ISBN 0-06-015620-1.
- ^ "I kind of decoded Bruce's note to Alfred from the Gotham by Gaslight movie - ESCAPING PREPGEAG BRING CYCLE : batman". www.reddit.com.
- ^ Dickerson (2019), p. 28.
- ^ Dickerson (2019), p. 74.
- ^ Dickerson (2019), p. 96.
- ^ De Waal, Ronald Burt (1974). The World Bibliography of Sherlock Holmes. Bramhall House. p. 392. ISBN 0-517-217597.
- ^ Bert Coules. "The Return of Sherlock Holmes". The BBC complete audio Sherlock Holmes. Retrieved 12 December 2016.
- ^ "8. The Dancing Men". Imagination Theatre. Retrieved 18 June 2020. (Roles specified in the end credits.)
- Sources
- Cawthorne, Nigel (2011). A Brief History of Sherlock Holmes. Running Press. ISBN 978-0762444083.
- Dickerson, Ian (2019). Sherlock Holmes and His Adventures on American Radio. BearManor Media. ISBN 978-1629335087.
- Smith, Daniel (2014) [2009]. The Sherlock Holmes Companion: An Elementary Guide (Updated ed.). Aurum Press. ISBN 978-1-78131-404-3.
External links[]
 The full text of The Adventure of the Dancing Men at Wikisource
 Media related to The Adventure of the Dancing Men at Wikimedia Commons
| Authority control |
|
|---|
- Sherlock Holmes short stories by Arthur Conan Doyle
- 1903 short stories
- Encodings
- Norfolk in fiction
- Cryptography in fiction
- Short stories adapted into films
- Works originally published in The Strand Magazine
- Works originally published in Collier's