I Corps (Australia)
| I Corps | |
|---|---|
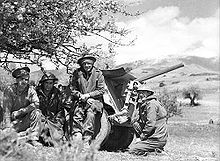
 Australian troops among the ruins of the old Crusader castle at Sidon, Lebanon, July 1941 | |
| Active | 1940–1945 |
| Country | |
| Branch | |
| Type | Corps |
| Size | Several divisions |
| Part of | First Army (from 1942) |
| Engagements | World War II |
| Commanders | |
| Notable commanders | Thomas Blamey Leslie Morshead |
| Insignia | |
| Unit colour patch |  |
I Corps was an Australian Army corps, one of three that were raised by the Army during World War II. It was the main Australian operational corps for much of the war. Various Australian and other Allied divisions came under its control at different times. In 1940–1942, the corps was based in the Mediterranean and Middle Eastern theatres, and controlled forces in action against the Germans, Italians and later the Vichy French in North Africa, Greece and Syria–Lebanon.
In 1942, following Japan's entry into the war, I Corps was transferred to the South West Pacific Area. Forces assigned to the corps undertook garrison duties in Ceylon, and briefly deployed to the ill-fated defence of Java in 1942, before returning to Australia. Between late 1942 and 1945, the corps oversaw Allied frontline units fighting against the Japanese in New Guinea and then Borneo in 1945.
History[]
Formation[]
At the outbreak of the Second World War, the Australian government decided to raise the Second Australian Imperial Force, an all volunteer force for overseas service that was separate to the previously existing part-time Militia.[1] Initially, this force consisted of a single division – the 6th Infantry Division – as well as some base and support troops. On 25 February 1940, the decision was made to expand the 2nd AIF to a corps, consisting of two infantry divisions – the 6th and 7th – and throughout March and into April work began to start forming the new units, and establish a corps headquarters, in Melbourne. This formation would be responsible for the AIF units forming in Australia. On 11 April 1940, the establishment of I Corps was gazetted, and by the middle of the month the headquarters' strength was reported as 12 officers and 45 other ranks.[2] Lieutenant General Thomas Blamey was appointed General Officer Commanding (GOC).[3]
In late May 1940, approval was provided for the 2nd AIF to raise a third division – the 8th – although it would ultimately not serve with I Corps. Preparations also commenced for I Corps headquarters personnel to begin moving overseas. A small rear corps headquarters was to remain in Australia, although the responsibility for command of troops in Australia would be devolved to the 7th Division until it also deployed. The initial deployment of staff began in May, but the majority of draft made it only as far as Fremantle, Western Australia, before disembarking and returning to Melbourne, when the decision was made to divert this convoy to the United Kingdom, rather than the main corps-area in the Middle East. The personnel who reached the UK were subsequently used to form HQ Australforce.[4] Meanwhile, the main element of the corps headquarters, including Blamey, reached Palestine in mid-June 1940.[2] They arrived amidst fighting in the Western Desert, and it was considered that the AIF troops could soon be committed to battle.[5]
Mediterranean and Middle Eastern theatres[]

Initially, when I Corps headquarters arrived there was only one Australian infantry division in the Middle East – the 6th, which was completing its training – however between October and December the 7th arrived, followed by the 9th by January 1941.[4] During this time, the brigades assigned to each division were shuffled between superior headquarters as a result of several reorganisations to provide the better trained brigades to the formations likely to see combat first.[6] At this time, the main elements of the corps headquarters moved forward towards the combat zone, leaving the administrative staff in Gaza and establishing themselves in Ikingi Maryut, in Egypt.[4] Here they began preparations for operations. The 6th Infantry Division was the first to go into action, capturing Bardia in early January 1941.[7] This was followed by further actions at Tobruk, Derna, Barce, and Benghazi, as the Italians were forced to withdraw across Libya by the Allies.[8][9]
In February, I Corps took over control of Cyrenaica in Libya, replacing the British XIII Corps, and briefly adopting the designation of HQ Cyrenaica Force.[7] This deployment lasted only a month, before I Corps headquarters was withdrawn back to Egypt to prepare for deployment to Greece for the campaign there, which began in April 1941. Initially, it had been planned for the 7th Division to deploy to Greece, but they were not considered fully trained, and as a result the 6th Division was dispatched. In their place, the newly arrived 9th Division replaced the 6th Division in the Western Desert, and they would subsequently take part in the Siege of Tobruk in mid- to late- 1941 when the Axis forces counter-attacked in the Western Desert.[10][11]
Meanwhile, in Greece, the corps controlled the Australian 6th Division, the New Zealand 2nd Division, and the British 1st Armoured Brigade, as well as several ad hoc forces charged with the defence of northern Greece. On 12 April, it was officially renamed the Anzac Corps, a reference to the combined Australian-New Zealand formations of World War I.[12] This was short-lived, though, as the Allied forces in Greece were quickly overcome by the German advance and after withdrawing from Gerania through Elasson, Larissa and Levadia, I Corps HQ left Greece on 23–24 April, and were subsequently evacuated to Egypt,[4] although elements of the 6th Division were landed on Crete where they fought another short and unsuccessful campaign in May.[13]
The corps re-formed in Deir Suneid, in Palestine, during which time the previous I Corps designation was assumed. In June 1941, as part of the initial plan for the invasion of Lebanon and Syria, held by Vichy French forces, I Corps was to take command of operations after Commonwealth forces reached their first objective,[4] the Beirut–Damascus road. However, on 18 June, prior to that objective being reached, I Corps headquarters – based at Nazareth – took charge, to improve command and control of the Allied forces.[14] From this date all Allied troops in the theatre came under the command of Lieutenant General John Lavarack, who took over from Blamey when he became deputy commander-in-chief in the Middle East.[15] The forces under I Corps' command around this time included: 7th Division (less the 18th Infantry Brigade), the British 6th Infantry Division, the 1st (Free French) Light Division and the 5th Indian Infantry Brigade Group.[4] The corps directed operations that captured Damascus and Damour before the armistice took effect on 12 July.[15] Following the armistice in July, I Corps headquarters was established at Aley, near Beirut,[16] and assumed responsibility for occupying all of Lebanon and Syria north of the Beirut–Damascus road.[17] Eventually, the Australian 6th Infantry Division arrived to relieve the British 6th.[16]
Pacific area[]
Java, Ceylon, and home defence[]
Following the outbreak of the Pacific War, I Corps headquarters, along with the 6th and 7th Divisions, were released from service in the Middle East to meet the threat posed by the Japanese advance through the Pacific.[18] The divisions departed Egypt by sea in several convoys between January and March 1942.[19] The 9th Division would remain in the Middle East, though, upon request,[20] and would see further action in the First and Second Battles of El Alamein, where they would be assigned to the British XXX Corps.[21]
As the situation in the Pacific grew desperate for the Allies, plans were made to deploy I Corps headquarters, and the 6th and 7th Divisions, to Sumatra, Java,[19] or possibly to Burma to help stem the tide of the Japanese advance on Rangoon. An advanced party, including the corps commander, Lavarack, flew to Java ahead of the landing and advised against deploying the force there, advising that they should be sent to Burma instead. The Australian government ultimately rejected the request to divert the 7th Division to Rangoon,[22] and although most of the force returned to Australia, Lavarack was not able to prevent some elements from landing in Java – mainly the troops on the transport Orcades consisting of a machine gun battalion (the 2/3rd) and a pioneer battalion (the 2/2nd), as well as engineers, transport and medical personnel, who became part of Blackforce under Brigadier Arthur Blackburn.[23] This force fought briefly alongside US and Dutch forces before being overwhelmed and taken into captivity.[24][25]

I Corps HQ was subsequently relocated to Australia, reaching Adelaide in March 1942 and then moving to Melbourne. The 7th Division deployed to northern New South Wales,[26] while the 6th Division (less the 19th Infantry Brigade which was sent to garrison Darwin) was detached to Ceylon to provide a garrison to defend against a possible Japanese invasion. The invasion did not eventuate, and the Australians remained on the island until July 1942,[27] and finally reached Australia the following month.[28]
While the 16th and 17th Brigades were in Ceylon, the Army in Australia had undergone a significant reorganisation to meet the threat of a possible Japanese invasion. In April 1942, I Corps headquarters was used to raise an army level formation, the First Army, and a new I Corps headquarters was raised from Headquarters Southern Command (previously the 3rd Military District.[29] I Corps came under the command of Lieutenant General Sydney Rowell around this time.[30] Assigned to the defence of southern Queensland, the new I Corps moved to Esk, Queensland, where it became part of the First Army and commanded troops in northern New South Wales and Queensland, including the 25th Infantry Brigade, the Brisbane Covering Force, the 7th Infantry Brigade, the 1st Motor Brigade and the remainder of the 7th Division, which was held back in reserve around Glen Innes, New South Wales.[29] In this assignment, it joined II Corps, one of the two other corps (the other being III Corps) raised at this time.[31] In May 1942, the corps was bolstered with the remainder of the 3rd Infantry Division, although they were transferred to II Corps in July, and moved further north, and were replaced within I Corps by the US 32nd Infantry Division.[29]
New Guinea[]
As the fighting in New Guinea intensified and the Japanese advanced beyond Kokoda, plans were made to reinforce the troops along the Kokoda Track. As a result, in August 1942, I Corps headquarters deployed to Port Moresby where they took over from the existing headquarters New Guinea Force, becoming Headquarters I Corps & New Guinea Force, although for all intents and purposes it was referred to as New Guinea Force. The formation subsequently commanded the troops around Milne Bay, which subsequently repulsed a Japanese landing, as well as the 7th Division troops deploying along the Track, the 6th Division troops around Port Moresby, and Kanga Force around Wau.[29]
In late September, following the withdrawal from Ioribaiwa Blamey decided to replace Rowell as corps commander with Lieutenant General Edmund Herring, who had previously commanded II Corps.[32] In October and November, the Japanese began to withdraw and the Australians – with elements from both the 6th and 7th Divisions – undertook counter-offensive that saw them reoccupy Kokoda, and then advance north towards the Japanese beachheads around Buna and Gona. These beachheads were eventually captured in December 1942 and January 1943 by Australian and US forces from the 7th and 32nd Infantry Divisions, after heavy fighting.[33] During this time, between November 1942 and January 1943, New Guinea Force deployed an advanced headquarters forward to control the fighting.[29]

Following the capture of northern Papua, New Guinea Force was reorganised, and new formations began arriving. Meanwhile, throughout the first half of 1943, Australian operations focused upon the capture of Salamaua, which saw a series of battles aimed at securing Salamaua prior to the drive on Lae. In August 1943, a new I Corps headquarters was raised from the New Guinea Force headquarters staff, and the corps headquarters established itself at Dobdura, where it was assigned to New Guinea Force as an army-level headquarters. Assigned the role of capturing Lae, I Corps was provided with the 7th Infantry Division, which in early September 1943 was flown in to Nadzab and attacked overland from there and the 9th Infantry Division, which carried out and amphibious landing to the east of Lae, before assaulting along the coast.[34][35] Lae was captured more quickly than had been expected, and later in the month, this was followed up by elements of the 9th Division which carried out a landing at Scarlet Beach, as part of operations to secure the Huon Peninsula, while the 7th Division began operations to secure the Markham and Ramu Valleys. The following month, however, I Corps headquarters was relieved by II Corps, as its personnel were in need of rest, and they subsequently returned to Australia. II Corps and New Guinea Force would subsequently command the conclusion of the operations commenced by I Corps, culminating in the capture of Madang in April 1944.[36]
Meanwhile, in Australia, I Corps headquarters was re-established at Barrine, Queensland, where it took command of units resting and training prior to their commitment for further operations. At this time, the corps was assigned the 3rd and 6th Infantry Divisions, based at Kairi and Wondecla respectively. In early 1944, the corps was also assigned the 9th Infantry Division, at Ravenshoe, following its return from New Guinea for rest.[35] In February 1944, Herring retired and command of I Corps temporarily passed to Lieutenant General Stanley Savige. In April 1944, I Corps headquarters provided individual staff reinforcements for the II Corps headquarters, although there was no name change at this time, and I Corps remained in Australia in order to command the 2nd AIF divisions, while II Corps took over the deployed Militia divisions: the 3rd, 5th and 11th. As a result, Lieutenant General Frank Berryman assumed command of I Corps.[37] In line with this, the 7th Infantry Division was transferred to I Corps at this time as they returned from New Guinea for rest, although they were based further south than the other elements, around Strathpine. Meanwhile, the 3rd Infantry Division re-deployed to New Guinea, and the 7th Infantry Division moved to Kairi, to concentrate nearer to the other I Corps formations.[35]
Borneo[]
Throughout 1944, plans were made for I Corps to be used in the Philippines and Ambon, but ultimately these were not acted upon as the role of Australian forces in the Pacific diminished and as US forces gained the ascendency.[35][38] By October 1944, Lieutenant General Leslie Morshead had assumed command of the corps.[39] Finally, it was decided that the force would be committed to the operation to re-take Borneo in mid-1945,[35] in order to secure important air and naval bases to allow further operations elsewhere in Borneo and then later Java.[40][41]

For the operation, the corps was placed directly under General Douglas MacArthur's command, rather than being assigned to the US Eighth Army.[42] Advanced elements of I Corps headquarters subsequently moved to Morotai Island in March 1945, followed by the remainder of the headquarters the following month. From there, they directed a series of amphibious landings that were carried out by the 7th and 9th Divisions at Tarakan, North Borneo and Balikpapan through May, June and July.[35] In all locations, the objectives were captured, albeit against stronger-than-expected resistance in some cases, with commensurately heavy casualties, after which the Australians pushed further inland, carrying out mopping up operations. On Tarakan, the airfield was captured five days after the landing, but it was badly damaged and ultimately filled no role in subsequent operations. Meanwhile, in North Borneo, after operations to secure Labuan and Brunei had proved successful, a follow up landing was made around Weston, with a subsequent advance towards Beaufort, which was captured after heavy engagement resulted in over 100 Japanese killed. By mid-July, the main resistance around Balkipapan and the coastal areas had been overcome, and the defending Japanese had withdrawn into the hills further inland.[43]
Following the cessation of hostilities in August, the corps assumed responsibility for facilitating the Japanese surrender on Borneo and in making preparations for returning the area to Dutch colonial control in the post war period.[35] This included undertaking local and protective patrols to maintain law and order and to secure Japanese soldiers who had not yet surrendered. As part of the demobilisation process, I Corps headquarters closed on 15 September 1945, at which time its constituent divisions were transferred to the direct command of Advanced Land Headquarters.[44] In the post war period, no corps-level formations have been raised by the Australian Army.[45]
Subordinate formations[]
In early 1941, when I Corps commenced operations in the Middle East, it consisted of the following formations:[46]
- 6th Infantry Division (16th, 17th and 19th Infantry Brigades)
- 7th Infantry Division (18th, 21st and 25th Infantry Brigades)
- 9th Infantry Division (20th, 24th and 26th Infantry Brigades)
In July – September 1943, I Corps consisted of the following formations:[47]
- 5th Infantry Division (15th, 17th, 29th Infantry Brigades, US 162nd Infantry Regiment)
- 7th Infantry Division (18th, 21st, 25th Infantry Brigades, US 503rd Parachute Regiment
- 9th Infantry Division (20th, 24th and 26th Infantry Brigades)
- 11th Infantry Division (6th Infantry Brigade)
- 4th Infantry Brigade
In the final stages of World War II, I Corps consisted of the following units:[48]
- 6th Infantry Division
- 7th Infantry Division
- 9th Infantry Division
Additionally, a number of Royal Australian Artillery units were attached to I Corps at various times. In many cases these artillery units were attached temporarily to HQ RAA 1st Australian Corps for training, reorganisation and re-equipping before deployment on active service under the command of other formations, principally the 3rd, 6th, 7th or 9th Australian Infantry Divisions.[49]
Commanders[]
The following officers served as commander of I Corps:[50]
- 1940–1941: Lieutenant General Thomas Blamey
- 1941–1942: Lieutenant General John Lavarack
- 1942: Lieutenant General Sydney Rowell
- 1942–1944: Lieutenant General Edmund Herring
- 1944: Lieutenant General Stanley Savige
- 1944: Lieutenant General Frank Berryman
- 1944–1945: Lieutenant General Leslie Morshead
Notes[]
- ^ Long 1961, p. 39.
- ^ a b AWM52 1/4/1/1: February – August 1940.
- ^ Long 1961, p. 84.
- ^ a b c d e f McKenzie-Smith 2018, p. 2017.
- ^ Long 1961, p. 99.
- ^ McKenzie-Smith 2018, pp. 2038–2046.
- ^ a b Johnston 2008, p. 32.
- ^ Thompson 2010, p. 89.
- ^ Johnston 2008, pp. 55–60.
- ^ Long 1953, p. 7.
- ^ Wilmot 1993, pp. 68 & 88.
- ^ Thompson 2010, p. 161.
- ^ McKenzie-Smith 2018, p. 2038.
- ^ Long 1953, pp. 413–414.
- ^ a b Horner 2000, pp. 61–63.
- ^ a b McKenzie-Smith 2018, pp. 2017–2018.
- ^ Long 1953, p. 515.
- ^ McKenzie-Smith 2018, p. 2018.
- ^ a b Hasluck 1970, p. 73.
- ^ Maughan 1966, pp. 537–538.
- ^ Pettibone 2006, p. 336.
- ^ Keogh 1965, p. 130.
- ^ Wigmore 1957, p. 457.
- ^ Johnston 2005a, pp. 80–81.
- ^ Wigmore 1957, p. 495.
- ^ McKenzie-Smith 2018, pp. 2018 & 2040.
- ^ Johnston 2008, pp. 126–128.
- ^ McKenzie-Smith 2018, p. 2040.
- ^ a b c d e McKenzie-Smith 2018, p. 2022.
- ^ Hill 2002.
- ^ McCarthy 1959, p. 26.
- ^ McCarthy 1959, p. 140 & 238.
- ^ Coulthard-Clark 1998, pp. 223 & 232–235.
- ^ Coulthard-Clark 1998, p. 241.
- ^ a b c d e f g McKenzie-Smith 2018, p. 2024.
- ^ McKenzie-Smith 2018, pp. 2023–2024.
- ^ Dexter 1961, p. 780.
- ^ Johnston 2005b, p. 14.
- ^ Long 1963, p. 19.
- ^ Keogh 1965, pp. 431–434.
- ^ Coulthard-Clark 1998, pp. 251–254.
- ^ Keogh 1965, p. 433.
- ^ Coulthard-Clark 1998, pp. 251–255.
- ^ AWM52 1/4/1/72: September 1945, part 1.
- ^ Dennis et al 1995, p. 182.
- ^ McKenzie-Smith 2018, pp. 2017 & 2038–2046.
- ^ Dexter 1961, p. 280.
- ^ Dennis et al 1995, p. 183.
- ^ AWM52 4/1/5/1: May – August 1940, p. 13.
- ^ I Australian Corps: Unit Appointments.
References[]
- "I Australian Corps: Unit Appointments". Orders of Battle. Retrieved 31 March 2011.
- "AWM52 1/4/1/1: February – August 1940: 1 Australian Corps General Branch (1 Aust Corps 'G' Branch)" (PDF). Unit war diaries, 1939–45 war. Australian War Memorial. Retrieved 21 April 2019.
- "AWM52 1/4/1/72: September 1945, part 1: 1 Australian Corps General Branch (1 Aust Corps 'G' Branch)" (PDF). Unit war diaries, 1939–45 war. Australian War Memorial. Retrieved 22 April 2019.
- "AWM52 4/1/5/1: May – August 1940: Royal Australian Artillery Headquarters, 1 Australian Corps". Unit war diaries, 1939–45 war. Australian War Memorial. Retrieved 1 May 2020.
- Coulthard-Clark, Chris (1998). The Encyclopaedia of Australia's Battles (1st ed.). Sydney, New South Wales: Allen & Unwin. ISBN 1-86448-611-2.
- Dennis, Peter; Grey, Jeffrey; Morris, Ewen; Prior, Robin (1995). The Oxford Companion to Australian Military History (1st ed.). Melbourne, Victoria: Oxford University Press. ISBN 0-19-553227-9.
- Dexter, David (1961). The New Guinea Offensives. Australia in the War of 1939–1945. Series 1 – Army. Vol. Volume VI. Canberra: Australian War Memorial. OCLC 2028994.
{{cite book}}:|volume=has extra text (help) - Hasluck, Paul (1970). The Government and the People 1942–1945. Australia in the War of 1939–1945. Series 4 – Civil. Vol. Volume II. Canberra: Australian War Memorial. OCLC 33346943.
{{cite book}}:|volume=has extra text (help) - Hill, A. J. (2002). "Rowell, Sir Sydney Fairbairn (1894–1975)". Australian Dictionary of Biography. Vol. Volume 16. Melbourne University Press. ISBN 978-0-52284-997-4.
{{cite book}}:|volume=has extra text (help) - Horner, David (2000). "Lavarack, Sir John Dudley (1885–1957)". Australian Dictionary of Biography. Vol. Volume 15. Melbourne University Press. pp. 61–63. ISBN 978-0-52284-843-4.
{{cite book}}:|volume=has extra text (help) - Johnston, Mark (2005a). The Silent 7th: An Illustrated History of the 7th Australian Division 1940–46. Crows Nest, New South Wales: Allen & Unwin. ISBN 1-74114-191-5.
- Johnston, Mark (2005b). The Huon Peninsula 1943–1944. Australians in the Pacific War. Canberra: Department of Veterans' Affairs. ISBN 1-920720-55-3.
- Johnston, Mark (2008). The Proud 6th: An Illustrated History of the 6th Australian Division 1939–1945. Port Melbourne, Victoria: Cambridge University Press. ISBN 978-0-521-51411-8.
- Keogh, Eustace (1965). South West Pacific 1941–45. Melbourne, Victoria: Grayflower Publications. OCLC 7185705.
- Long, Gavin (1961) [1952]. To Benghazi. Australia in the War of 1939–1945. Series 1 – Army. Vol. Volume I (Reprint ed.). Canberra: Australian War Memorial. OCLC 18400892.
{{cite book}}:|volume=has extra text (help) - Long, Gavin (1953). Greece, Crete and Syria. Australia in the War of 1939–1945. Series 1 – Army. Vol. II (1st ed.). Canberra, Australian Capital Territory: Australian War Memorial. OCLC 3134080.
- Long, Gavin (1963). The Final Campaigns. Australia in the War of 1939–1945. Series 1 – Army. Vol. Volume VII (1st ed.). Canberra: Australian War Memorial. OCLC 1297619.
{{cite book}}:|volume=has extra text (help) - Maughan, Barton (1966). Tobruk to El Alamein. Australia in the War of 1939–1945, Series 1 – Army. Vol. Volume III (1st ed.). Canberra, Australian Capital Territory: Australian War Memorial. OCLC 954993.
{{cite book}}:|volume=has extra text (help) - McCarthy, Dudley (1959). South-West Pacific Area – First Year. Australia in the War of 1939–1945. Series 1 – Army. Vol. Volume V. Canberra: Australian War Memorial. OCLC 3134247.
{{cite book}}:|volume=has extra text (help) - McKenzie-Smith, Graham (2018). The Unit Guide: The Australian Army 1939–1945, Volume 2. Warriewood, New South Wales: Big Sky Publishing. ISBN 978-1-925675-146.
- Pettibone, Charles (2006). The Organization and Order of Battle of Militaries in World War II. Vol. Volume II: The British Commonwealth. Victoria, British Columbia: Trafford. ISBN 1-4120-8567-5.
{{cite book}}:|volume=has extra text (help) - Thompson, Peter (2010). Anzac Fury: The Bloody Battle of Crete 1941. North Sydney, New South Wales: William Heinemann. ISBN 978-1-86471-131-8.
- Wigmore, Lionel (1957). The Japanese Thrust. Australia in the War of 1939–1945. Series 1 – Army. Vol. Volume IV (1st ed.). Canberra, Australian Capital Territory: Australian War Memorial. OCLC 3134219.
{{cite book}}:|volume=has extra text (help) - Wilmot, Chester (1993) [1944]. Tobruk 1941. Ringwood, Victoria: Penguin Books. ISBN 0-14-017584-9.
- Corps of Australia in World War II
- Military units and formations established in 1940
- 1940 establishments in Australia
- Military units and formations of Australia in World War II
- Military units and formations disestablished in 1945
- 1945 disestablishments in Australia