1st Light Horse Brigade
| 1st Light Horse Brigade | |
|---|---|
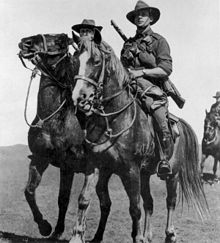 A trooper of the 1st Light Horse Regiment | |
| Active | 1902–1921 |
| Country | Australia |
| Allegiance | Australian Crown |
| Branch | Australian Army |
| Type | Mounted infantry |
| Role | Light horse |
| Size | ~1,500 personnel |
| Part of | 1st Australian Contingent (1914–15) Australian and New Zealand Army Corps (ANZAC) New Zealand and Australian Division (1915–16) Anzac Mounted Division (1916–19) |
| Equipment | Horse, rifle and bayonet |
| Engagements | World War I
|
| Commanders | |
| Notable commanders | Harry Chauvel Charles Frederick Cox |
| Insignia | |
| Unit colour patch | |
The 1st Light Horse Brigade was a mounted infantry brigade of the Australian Imperial Force (AIF), which served in the Middle Eastern theatre of World War I. The brigade was initially formed as a part-time militia formation in the early 1900s in New South Wales and then later in Queensland. In 1914, the brigade was re-constituted as part of the AIF and was sent to Egypt. Forming part of the New Zealand and Australian Division, during the Gallipoli Campaign it served in a dismounted role between May and December 1915. After being withdrawn to Egypt it served in the Anzac Mounted Division from March 1916 as part of the Egyptian Expeditionary Force, taking part in the Sinai and Palestine Campaign until the end of the war. It was disbanded in 1919. After the war, the AIF light horse regiments were demobilised and disbanded; however, the brigade briefly existed as a part-time militia formation in Queensland until 1921 when its regiments were reorganised into cavalry brigades.
History[]
Early formation[]
The 1st Light Horse Brigade was initially raised as part of the Citizens Forces in the early 1900s, being formed sometime between 1902 and 1905. That formation was raised in New South Wales, and consisted of three light horse regiments – the 1st (New South Wales Lancers), 2nd (New South Wales Mounted Rifles) and 3rd (Australian Horse). The 1st had depots around Parramatta and other smaller centres; the 2nd was based in Sydney and was spread out across depots from Camden to Dubbo; and the 3rd was based in several small towns including Bega, Goulburn and Bungendore. In 1912, an Army wide reorganisation resulted in the brigade's designation being reused for a Queensland-based formation, consisting of the 2nd Light Horse (Queensland Mounted Infantry), the 3rd Light Horse (Darling Downs Regiment), and 4th Light Horse (Northern River Lancers). The 2nd had depots in Brisbane and its surrounds, spread out to Laidley and Ipswich, while the 3rd was based around Toowoomba, Warwick, Roma and other smaller centres; the 4th was based around Lismore, Casino, Grafton and a couple of other smaller centres.[1] The previously assigned New South Wales-based regiments were redesignated and reassigned to 2nd and 3rd Light Horse Brigades.[2]
World War I[]
Formation and service at Gallipoli[]
At the outbreak of the war August 1914 the Australian Government decided to raise the all- volunteer Australian Imperial Force (AIF) consisting of 20,000 troops comprising an infantry division and a light horse brigade of three regiments to be used at the discretion of Britain.[3] These regiments were raised from volunteers for overseas service, as the provisions of the Defence Act did not allow conscripts to be deployed overseas. Nevertheless, many of the recruits were drawn from the various militia light horse formations created as a consequence of the Kitchener Report 1910 and the introduction of Universal Training, although they were assigned to freshly raised units that were separate to the light horse regiments raised as part of the militia. Initial enlistments outstripped expectations and, as a result, a total of three light horse brigades as well as two divisional cavalry regiments were formed in the early part of the war.[4]
The 1st Light Horse Brigade was the first light horse formation raised at the start of the war. It was part of the 1st Contingent that was hastily put together in the middle of August 1914, and consisted of 1,560 men organised into three regiments – the 1st, 2nd and 3rd – each of approximately 520 men,[5] under the overall command of Brigadier General Harry Chauvel.[6] The brigade's personnel were drawn from the states of New South Wales, Queensland, South Australia, and Tasmania.[6]

Following its formation, the brigade began embarking for Egypt from Sydney,[7] Brisbane, Adelaide and Hobart, in September and October 1914. Upon arrival in December 1914,[8][9][10] the brigade moved into camp at Mena, where training was undertaken, and further reinforcements were received from Australia.[11] In May 1915, the brigade was deployed to Gallipoli as reinforcements for the infantry that had landed in April, but had become pinned around a small perimeter around a beachhead at Anzac Cove; deployed in a dismounted role, the brigade was assigned to the New Zealand and Australian Division. About a quarter of the strength of each light horse regiment remained in Egypt with their horses; however, additional reinforcements were provided prior to their arrival, to bring them up to strength.[12][13]
Upon arrival, Chauvel's brigade was assigned to hold part of the defensive line that the Allies had established around Anzac Cove. During this time, they undertook patrolling operations, occupied outposts, carried out sniping and worked to dig trenches and lay down wire.[14] For the majority of the campaign the brigade's regiments maintained a defensive posture; however, in August the Allies attempted to break the deadlock on the Gallipoli peninsula, launching the August Offensive in an effort to secure the heights around Sari Bair, Chunuk Bair and Baby 700.[15] During this effort, the 1st Light Horse Regiment carried out a feint attack at Pope's Hill, in support of the attack at the Nek. Out of 200 men committed, less than 40 survived.[16] Meanwhile, the 2nd Light Horse Regiment undertook its own attack around Quinn's Post; this too met little success and was called off after the first wave of attackers suffered many casualties.[9] Meanwhile, the 3rd Light Horse Regiment was held back in reserve.[10] Following the failed offensive, the brigade occupied positions around the top of Monash Valley, which remained strongly contested.[14] As winter approached, in early September, they were moved to a more secure location on the seaward side, to the north of Anzac Cove, towards Suvla Bay; this position included outposts at Destroyer Hill and Sazli Dere, which had been captured in late August during the Battle of Hill 60.[17] By mid-December all three regiments were withdrawn from the peninsula, as part of the general withdrawal that followed the decision to abandon the position. The 3rd Light Horse Regiment was the first to depart, leaving on 14 December; it was followed by the 2nd on 18 December, while the 1st remained until 21 December,[8][9][10] which was the last day. They were subsequently returned to Egypt, sailing via Mudros.[18]
Sinai and Palestine campaign[]
After the evacuation from Gallipoli, the Australian and New Zealand forces in the Middle East were reorganised. There were a large number of reinforcements that had arrived in Egypt at this time, and while the infantry was to be deployed to the Western Front, the mounted units were to remain in the Middle East.[19] This resulted in the establishment of the Anzac Mounted Division, which consisted of the 1st, 2nd and 3rd Light Horse Brigades, and the New Zealand Mounted Rifles Brigade. Chauvel had been promoted to command this division, while Brigadier General Charles Frederick Cox, who had taken over command of the brigade in early November 1915, remained in command of the 1st Light Horse Brigade.[20] He would remain in command of the brigade until after the end of the war.[21] At this time, the brigade was provided with a British Territorial horsed artillery battery,[20] the Leicestershire Battery, which was detached from III Brigade, Royal Horse Artillery (T.F.).[21] Until July 1916, the brigade was supported by a machine gun section, but this was then expanded to a full squadron, equipped with 12 machine guns.[21] A light horse training regiment was also established for each brigade, to provide trained reinforcements, while other supporting elements including signals, logistic, engineer, medical and veterinary support units were also assigned.[22]

In the early part of 1916, the 1st Light Horse Brigade was sent to guard parts of the Nile and Suez Canal from Senussi tribesmen.[23] This lasted from January to May 1916; afterwards it was reassigned to defend the Suez Canal.[24] In August 1916, the brigade helped repel an Ottoman advance on the canal during the Battle of Romani, which took place 35 kilometres (22 mi) to the east; they were involved in the initial fighting as the Ottoman forces clashed with the brigade on the night of 3/4 August, which had occupied outposts throughout the area that the Ottoman commanders had detailed as the forming up position for their attack on the Suez Canal. Threatened with being outflanked, the brigade was pushed back in the early morning, but they were reinforced just in time by the 2nd Light Horse Brigade, which appeared on the brigade's right and helped restore the situation. They were followed by New Zealand and British troops who launched a counterattack later in the day,[25] while the two light horse brigades remained in the centre. Initially too exhausted to counterattack, they were committed early on 5 August, advancing with bayonets drawn.[26] As the tide of the fighting turned, in the following days, the brigade was committed to the pursuit that followed as the Ottoman forces began to withdraw.[8][9][10]
After a period of rest out of the line, the brigade returned to join the advance across the Sinai into southern Palestine, taking part in actions at Maghdaba in December 1916, and at Rafa in early January 1917.[8][9][10] During the first battle, the attack was hampered by limited artillery and a lack of water; this resulted in slow progress from the dismounted troops and eventually Chauvel decided to withdraw back to El Arish. However, the commander of the 1st Light Horse Brigade delayed following the order and pushed the dismounted 3rd Light Horse Regiment forward against an Ottoman redoubt in the northwest, which proved to be successful and wrested the initiative from the Ottomans. The 2nd Light Horse Regiment carried out a mounted attack to the south, and captured another Ottoman redoubt, while other units also began to make gains, resulting in a general advance.[27] A fortnight later, they began to advance towards Rafa, and the 1st Light Horse Brigade was committed along with the New Zealand Mounted Rifles and the Imperial Camel Corps.[28]
For several months, the brigade undertook defensive duties, protecting lines of communication, before taking part in the unsuccessful Second Battle of Gaza in April 1917. After this, British planners decided to attempt an indirect approach, focusing their efforts on Beersheba, about 50 kilometres (31 mi) from Gaza.[29] In late October and early November, the brigade took part in the Battle of Beersheba; the breakthrough here paved the way for the opening of the Southern Palestine Offensive,[30] after which the brigade participated in the advance north towards Jaffa on the coast. Jerusalem was captured in November 1917, and after this the brigade moved inland east towards the Jordan River, to occupy defensive positions along the western bank as part of the British occupation of the Jordan Valley.[8][9][10]

In February 1918, the Somerset Battery was detached from XVIII Brigade, Royal Horse Artillery (T.F.), replacing the Leicestershire Battery.[21] In the middle of the month, the brigade took part in the capture of Jericho, during which the Anzac Mounted Division was placed on the right of two British infantry divisions, pushing through a large gorge near the Dead Sea towards Rujm el Bahr.[31][32] At the end of the month, the brigade pushed further west and took part in the failed First Battle of Amman during the First Transjordan attack on Amman. This was followed by the raid on Es Salt in April and May,[8][9][10] and then launched a counterattack on 14 July during the Battle of Abu Tellul following an attack by two Ottoman divisions.[33] Following this, the Allies renewed their offensive, during which the Anzac Mounted Division was assigned to a mixed force that became known as Chaytor's Force to join the Third Transjordan attack, supporting the main drive towards Damascus further to the north.[34] The Australian Mounted Division who were advancing along the coast, employed cavalry tactics, having been issued swords and trained in their use in August; however, the Anzac Mounted Division continued to be employed as mounted rifles.[35] In late September, the brigade took part in the Second Battle of Amman.[8][9][10] During their final battle of the war, the brigade helped clear the west bank of the Jordan, before crossing the river at Uniin esh Sher and then advanced to Es Salt, before later advancing to Suweile and supporting the capture of Amman.[36] On 30 October, the Ottomans surrendered, and the Armistice of Mudros came into effect, bringing an end to the fighting in the theatre.[37]
Disbandment and perpetuation[]
After the conclusion of hostilities, the Anzac Mounted Division undertook occupation duties in southern Palestine until it returned to Egypt in early 1919.[38] The various regiments within the brigade embarked for Australia around March 1919.[8][9][10] The horses remained behind due to cost and quarantine issues, and were either destroyed or undertook further service in Egypt or Syria.[39] The brigade's headquarters finally closed on 4 July 1919 after arriving in Sydney.[40]

Throughout late 1918 and early 1919, the process of demobilising the AIF continued, although this would not be complete until 1921.[41] At this time, the militia formations that had remained in Australia for home service were reorganised to realign them with the recruitment areas that had contributed to the AIF regiments, and to replicate the AIF's organisational structure and designations. These formations had continued to exist alongside the AIF in Australia, albeit largely on paper only as they had been reduced significantly due to large-scale enlistment in the AIF, and a lack of funds and resources for training.[42] By 1919, a 1st Light Horse Brigade had been formed in the militia, consisting of 2nd, 5th and 11th Light Horse Regiments, which were based in Brisbane, Ipswich, Gympie, and Toowoomba.[43]
In the first couple of years after the war, plans were made to reorganise the home forces to meet the needs of peacetime while providing a strong base upon which to mobilise if necessary. By 1921, when the AIF was officially disbanded, plans were approved to raise two cavalry divisions, each of three brigades, utilising a mix of voluntary enlistment and compulsory service.[44] At this time, the brigades were designated as cavalry brigades, rather than light horse brigades,[45] and the 1st Light Horse Brigade ceased to exist. Within the new structure, the 2nd Light Horse Regiment became part of the 11th Mixed Brigade, while the 5th and 11th Light Horse Regiments were assigned to the 1st Cavalry Brigade, based in the same locations as before.[46]
Composition[]
During World War I, the 1st Light Horse Brigade consisted of the following:[8][9][10][21]
- 1st Light Horse Regiment
- 2nd Light Horse Regiment
- 3rd Light Horse Regiment
- 1st Light Horse Machine Gun Squadron (1916–1919)
- 1st Light Horse Signal Troop
- 1st Light Horse Field Ambulance
- 1st Light Horse Brigade Train
- 6th Mobile Veterinary Section (1916–1919)
- Leicestershire Battery of III Brigade, Royal Horse Artillery (T.F.) (1916–1918)
- Somerset Battery of XVIII Brigade, Royal Horse Artillery (T.F.) (1918–1919)
- 1st Light Horse Training Regiment
- 1st Light Horse Double Squadron (July – November 1916)
Commanders[]
The following officers commanded the brigade during the war:[21]
- Brigadier General Harry Chauvel (15 August 1914 – 6 November 1915)
- Brigadier General Charles Frederick Cox (6 November 1915 – 13 March 1919)
See also[]
References[]
Citations
- ^ Hall 1968, pp. 61–71.
- ^ Hall 1968, p. 70.
- ^ Grey 2008, p. 85.
- ^ Bou 2010a, pp. 99 & 141.
- ^ Perry 2012, p. 31.
- ^ Jump up to: a b Grey 2008, p. 88.
- ^ Perry 2009, p. 45.
- ^ Jump up to: a b c d e f g h i "1st Light Horse Regiment". First World War, 1914–1918 units. Australian War Memorial. Archived from the original on 13 March 2011. Retrieved 8 September 2010.
- ^ Jump up to: a b c d e f g h i j "2nd Light Horse Regiment". First World War 1914–1918 units. Australian War Memorial. Archived from the original on 4 July 2013. Retrieved 29 November 2011.
- ^ Jump up to: a b c d e f g h i j "3rd Light Horse Regiment". First World War, 1914–1918 units. Australian War Memorial. Archived from the original on 20 August 2016. Retrieved 30 November 2011.
- ^ "Troop transport ships". Australian Light Horse Studies Centre. Retrieved 19 April 2014.
- ^ Bou 2010a, pp. 145–146.
- ^ Travers 2002, pp. 272–273.
- ^ Jump up to: a b Bou 2010a, p. 146.
- ^ Perry 2009, pp. 100–101.
- ^ Bou 2010a, p. 147.
- ^ Perry 2009, p. 121.
- ^ Bou 2010a, p. 149.
- ^ Grey 2008, pp. 98–100.
- ^ Jump up to: a b Bou 2010a, p. 150.
- ^ Jump up to: a b c d e f "1st Australian Light Horse Brigade". Australian Light Horse Studies Centre. Retrieved 19 April 2009.
- ^ Bou 2010a, pp. 149–150.
- ^ Bou 2010b, p. 9.
- ^ Bou 2010a, p. 155.
- ^ Bou 2010b, p. 13.
- ^ Coulthard-Clark 1998, p. 119.
- ^ Bou 2010b, p. 22.
- ^ Bou 2010b, p. 25.
- ^ Bou 2010b, p. 41.
- ^ Bou 2010b, p. 52.
- ^ Cutlack 1941, p. 102.
- ^ Gullett 1941, p. 536.
- ^ Bou 2010a, p. 191.
- ^ Bou 2010b, p. 137.
- ^ Bou 2010b, p. 108.
- ^ Gullett 1941, pp. 718–719.
- ^ Bou 2010a, p. 197.
- ^ Bou 2010a, p. 200.
- ^ Bou 2010a, p. 201.
- ^ "AWM4 10/1/59 – June–July 1919: 1st Light Horse Brigade". Australian Imperial Force unit war diaries, 1914–18 war. Australian War Memorial. Retrieved 4 August 2019.
- ^ Grey 2008, p. 125.
- ^ Bou 2010a, pp. 110–111.
- ^ Hall 1968, p. 75.
- ^ Hall 1968, p. 47.
- ^ Bou 2010a, p. 229.
- ^ Hall 1968, pp. 77–78.
Bibliography
- Bou, Jean (2010a). Light Horse: A History of Australia's Mounted Arm. Port Melbourne, Victoria: Cambridge University Press. ISBN 978-0-52119-708-3.
- Bou, Jean (2010b). Australia's Palestine Campaign. Australian Army Campaign Series # 7. Canberra, Australian Capital Territory: Army History Unit. ISBN 978-0-9808100-0-4.
- Coulthard-Clark, Chris (1998). The Encyclopaedia of Australia's Battles (1st ed.). Sydney, New South Wales: Allen & Unwin. ISBN 1-86448-611-2.
- Cutlack, F.M. (1941). The Australian Flying Corps in the Western and Eastern Theatres of War, 1914–1918. Official History of Australia in the War of 1914–1918. VIII (11th ed.). Canberra: Australian War Memorial. OCLC 220900299.
- Grey, Jeffrey (2008). A Military History of Australia (3rd ed.). Melbourne, Victoria: Cambridge University Press. ISBN 978-0-521-69791-0.
- Gullett, Henry (1941). The Australian Imperial Force in Sinai and Palestine, 1914–1918. Official History of Australia in the War of 1914–1918. VII (10th ed.). Sydney, New South Wales: Angus & Robertson. OCLC 220624545.
- Hall, Richard John (1968). The Australian Light Horse. Blackburn, Victoria: W.D. Joynt & Co. OCLC 59504.
- Perry, Roland (2012). Bill the Bastard: The Story of Australia's Greatest War Horse. Sydney, New South Wales: Allen & Unwin. ISBN 978-1-74331-262-9.
- Perry, Roland (2009). The Australian Light Horse. Hachette Australia. Sydney. ISBN 978-0-7336-2272-4.
- Travers, Tim (2002). Gallipoli 1915. Charleston, South Carolina: Tempus. ISBN 0-7524-2551-X.
External links[]
- Australian Light Horse
- Military units and formations established in 1902
- Military units and formations disestablished in 1921