Military history of New Zealand during World War I

The military history of New Zealand during World War I began in August 1914. When Britain declared war on Germany at the start of the First World War, the New Zealand government followed without hesitation, despite its geographic isolation and small population. It was believed at the time that any declaration of war by the United Kingdom automatically included New Zealand; and the Governor (the Earl of Liverpool) announced that New Zealand was at war with Germany from the steps of Parliament on 5 August.[1][2][3]
The total number of New Zealand troops and nurses to serve overseas in 1914–18, excluding those in British and other Dominion forces, was 100,444, from a population of just over a million. Forty-two percent of men of military age served in the New Zealand Expeditionary Force, fighting in the Gallipoli Campaign and on the Western Front. 16,697 New Zealanders were killed and 41,317 were wounded during the war – a 58 percent casualty rate.[4] Approximately a further thousand men died within five years of the war's end, as a result of injuries sustained, and 507 died while training in New Zealand between 1914 and 1918.
The First World War saw Māori soldiers serve for the first time in a major conflict with the New Zealand Army (although a number had fought in the Second Boer War when New Zealand recruiters chose to ignore British military policy of the time of disallowing 'native' soldiers). A contingent took part in the Gallipoli campaign, and later served with distinction on the Western Front as part of the New Zealand (Māori) Pioneer Battalion. 2688 Māori and 346 Pacific islanders, including 150 Niueans,[5] served with New Zealand forces in total.
Outbreak of the war[]
Upon the outbreak of the war, the New Zealand Government authorised the raising of the New Zealand Expeditionary Force (NZEF) for service overseas. Mobilisation for the NZEF had already begun, with preparations discreetly beginning a few days prior to the declaration of war.[6] Mobilisation quickly followed and by late September, the NZEF consisted of two brigades – the New Zealand Infantry Brigade and the New Zealand Mounted Rifles Brigade.[7]
Samoa[]

The day after the declaration of war, the British Government requested New Zealand seize the wireless station on the island of Upolu, part of Imperial Germany's protectorate of German Samoa,[8] deeming it "a great and urgent Imperial service."[9] A mixed force of 1,413 men, known as the Samoan Expeditionary Force (SEF) under the command of Colonel Robert Logan, plus six nursing sisters, sailed from New Zealand on 15 August 1914.[10] After stopping in Fiji to collect some guides and interpreters as well as additional escort ships,[11] the New Zealanders arrived at Apia on 29 August 1914.[12]
Germany refused to officially surrender the islands but with only a minimal military presence, there was little prospect for meaningful resistance. The Governor of German Samoa, Dr. Erich Schultz, sent a message from the island's radio station that no resistance would be offered. The New Zealanders proceeded to land at Apia and seized key buildings and facilities without interference. The only opposition encountered was at the radio station, where the equipment was sabotaged by the German operators. Logan officially declared German Samoa to be under the control of New Zealand the following day, 30 August 1914, in a ceremony at the courthouse in Apia.[13]
When Vizeadmiral (Vice Admiral) Maximilian von Spee, commander of Germany's East Asia Squadron, learned of the occupation, he hastened to Samoa with the armoured cruisers SMS Scharnhorst and SMS Gneisenau. Arriving at Apia on 14 September 1914, the approach of the German ships was observed and the New Zealanders prepared to defend themselves.[14] However, von Spee and his ships soon departed for Tahiti, with neither side opening fire.[15] The SEF remained in Samoa until March 1915 at which time it began returning to New Zealand, a process completed by the following month.[16]
Middle East[]
Training in Egypt[]


As early as October 1914 the main body of the NZEF sailed from Wellington. Diverted from their original destination in Europe, the New Zealanders were landed in Egypt along with elements of the AIF.
In December 1914, the Australian and New Zealand Army Corps, under Lieutenant General William Birdwood, was formed to command both the AIF and NZEF components. The headquarters staff for this formation amounted to 70 officers and 550 men. These were mostly provided by the British and it was formally part of the British Army.[17] The AIF was able to field one complete Australian division, and had one each of mounted and infantry brigades. To form the second infantry division of the corps, Birdwood included these with the two brigades of the NZEF. This division was to be known as the New Zealand and Australian Division, with Godley as its commander.[18]
While the New Zealand and Australian Division was forming and training in Egypt, elements were committed to the defence of the Suez Canal. On 26 January 1915, the four infantry battalions of the New Zealand Infantry Brigade – the Auckland, Canterbury, Wellington and Otago Battalions – and a supporting field ambulance were deployed in anticipation of an attack on the canal by Ottoman forces. This force was split between Ismailia and Kubri.[19] On 2 February, after the Ottomans launched a raid on the Suez Canal, elements of the brigade took part in repelling the attack, with the Canterbury Battalion suffering the division's first losses in battle, with two men being wounded, one of whom later died.[20]
Gallipoli, Turkey[]
On 25 April 1915, as part of the New Zealand and Australian Division, the New Zealanders landed at Anzac Cove on the Gallipoli peninsula, and fought in the Gallipoli Campaign under the command of British General Alexander Godley. The combined British Empire and French operation was mounted in order to eventually capture the Ottoman capital of Constantinople (now Istanbul). Because of a navigational error, the Anzacs came ashore about a mile north of the intended landing point in their initial landing. Instead of facing the expected beach and gentle slope they found themselves at the bottom of steep cliffs, offering the few Turkish defenders an ideal defensive position. Establishing a foothold, the Anzacs found an advance to be impossible. On 30 April 1915, when the first news of the landing reached New Zealand a half-day holiday was declared and impromptu services were held – the origin of the commemorative public holiday, ANZAC Day, recognised by New Zealand and Australia and held each year on 25 April.[21][22]
Evacuation from Gallipoli[]
Despite the blunder at ANZAC Cove, the New Zealand soldiers fought valiantly throughout the campaign, which was a failed venture overall. The estimated casualties on both sides were 392,000 of whom 131,000 were killed, with New Zealand casualties of 2,721 dead and 4,852 wounded. At least 16,000 (perhaps 17,000) NZEF soldiers served at Gallipoli (the figure of 8556 given by Hamilton in his forward to Waite's demi-official 1919 history was always known to be too low; see link to ebook below).[23]
The Allied forces eventually evacuated in December 1915 and early January 1916. The significance of the Gallipoli Campaign was strongly felt in New Zealand (and Australia) where it was the first great conflict experienced by the fledgling nation. Before Gallipoli the citizens of New Zealand were confident of the superiority of the British Empire and were proud and eager to offer their service. The campaign in Gallipoli shook that confidence.
The New Zealand Rifle Brigade (less two battalions) had meanwhile reached Egypt in November 1915 and was sent into the Egyptian desert to help defeat a Senussi invasion from Libya. The 1st Battalion fought two brisk but inexpensive actions south-west of Matruh as part of a mixed force (including British, Australians, and Indians), one on Christmas Day, the other on 23 January 1916. Both were successful and broke the back of the invasion. In mid-February the 1st Battalion rejoined the rest of the brigade at Moascar in the Suez Canal area.
Palestine Campaign[]
In Egypt, the New Zealand Expeditionary Force was reorganised into the New Zealand Mounted Brigade and the New Zealand Division (infantry). Reinforcements from New Zealand replaced the Australian component of the division, which embarked for France in April 1916. The New Zealand Mounted Brigade, 147 officers and 2,897 other ranks, remained in Egypt as part of the Anzac Mounted Division. In April 1916, it was deployed to the Sinai Peninsula where it took part in the ultimately successful Sinai and Palestine Campaign against the Turks. New Zealanders fought in most of the battles leading up to the fall of Jerusalem and the defeat of the Ottoman Army, and were praised for their fighting alongside their Australian and British comrades. In 1919, Field Marshal Sir Edmund Allenby, said this of the New Zealand soldiers in the Sinai campaign;
- "Nothing daunted these intrepid fighters: to them nothing was impossible."
A total of 17,723 New Zealanders served in this campaign and New Zealand casualties were 640 killed in action and 1,146 wounded.
Training in England[]
While in England – either freshly arrived from New Zealand or having already served at Gallipoli and awaiting transfer to the Western Front – New Zealand troops were stationed at Sling Camp, an annexe of Bulford Camp in Wiltshire. The troops who were still stationed at the camp at the end of the war created the giant chalk kiwi known as the Bulford Kiwi whilst waiting to be repatriated.
Western Front[]

In France, the New Zealand Division settled in on the stalemated Western Front and their first major trial was during the Battle of the Somme. It took part in the Fourth Army's attack on 15 September, under the command of the British XV Corps. By the time they were relieved on 4 October, the New Zealanders had advanced three kilometres and captured eight kilometres of enemy front line. 7,048 had become casualties, of whom 1,560 were killed.
In June 1917, the New Zealand Division further distinguished itself in the storming of Messines Ridge and the capture of the village of Messines. On 7 June, after the detonation of nearly 500 tons of explosives in huge mines on both sides of the New Zealand sector, the 2nd and 3rd Brigades scrambled over the top, in and out of shell holes, and up the battered slopes. Carrying the German front line and supports, they were soon into the ruined village. The 1st Brigade passed through, helped on the left by a solitary tank, to the final objective. With prisoners and booty including many guns it was a striking success at no great cost; but the German artillery revived and by the time the division was relieved on 9 and 10 June it had lost 3,700 men, evenly distributed between the three brigades.
The New Zealand Division's next major engagement was at Passchendaele in October 1917. The division had been training since the end of August to overcome the numerous concrete pillboxes in this sector. The first objective was the Gravenstafel Spur, attacked before dawn on 4 October, as part of a major advance. The 1st and 4th Brigades forestalled a heavy German counter-attack, and the supporting artillery barrage inflicted frightful slaughter on the waiting Germans. Crossing this scene of carnage, the 1st and 4th Brigades gained their objectives after a hard fight, inflicting exceptionally heavy loss on the enemy and capturing much equipment. For such a resounding success the 1,700 New Zealand casualties, though a sad loss, did not in current terms seem excessive. But heavy rain turned the countryside into a bog and tragedy lay ahead.
A British attack on the ninth on Bellevue Spur and part of the main Passchendaele ridge gained a little ground at prohibitive cost. Heavy swathes of barbed wire still girdled the hillside, however, and belated and meagre heavy artillery made no impression on them, nor on the many pillboxes beyond. New Zealand gunners slaved to breaking point to get only a few guns and howitzers forward, but stable platforms and accurate fire were unattainable.
The division returned to the attack on 12 October, with the 2nd and 3rd Brigades. There was little to encourage the men as they waited overnight in a morass under steady rain. Shelled in their assembly area, some were shelled again by their own guns when the thin barrage opened at 5.25 a.m., and then they led off into a deluge of small-arms fire, speckled with geyser-like eruptions as shells exploded in the mud. Worst of all was the wire, covered with deadly fire, its few gaps deliberate deathtraps. Some men tried to crawl under it, some threw themselves at it, two got right through and were killed in the act of hurling grenades at the loopholes of the nearest pillbox. The left gained 500 yards of slippery slope, the centre 200 heartbreaking yards, the right nothing until the 80-odd occupants of two blockhouses and a trench used up all their ammunition. Then they were captured, blockhouses and all, by two brave and skillful men, sole survivors of two Otago platoons.
For these small gains, the New Zealanders suffered 640 dead and 2,100 wounded. For the first time the division had failed in a major operation. After this failure, the division continued to hold a sector of the line. The steady drain of men while units only held the line was less spectacular, though it made up half the losses of the division. Here, before withdrawing from the front, 400 more men were lost in the 4th Brigade alone.
The division now had four brigades, making it one of the largest on the Western Front, and was stationed in the Polygon Wood area. An attack by the 2nd Brigade on 3 December 1917 gained useful ground but failed to capture Polderhoek Chateau. When the division was relieved, on 24 February 1918, three "quiet" months had cost 3,000 men, more than 1,873 of them killed.
As the Germans launched their great Spring Offensive of 1918, the New Zealand Division was rushed to stem a breakthrough in the First Battle of the Somme, which threatened Amiens. The gap was between the British IV and V Corps in the Ancre Valley. After confused fighting, the New Zealanders eventually gained the upper hand and soon were counter-attacking advantageous land, stabilising the British line. Later in the year, they excelled in the open country fighting that was brought about by the Allied counter-offensive.

In their last action of the war, the division captured the ancient fortress (Vauban-designed) town of Le Quesnoy in a daring assault on 4 November 1918. The day proved to be the division's most successful of their whole time on the Western Front as they pushed east and advanced ten kilometres, capturing 2,000 German soldiers and 60 field guns. The town occupied a strategic position in north-eastern France and had been held by the Germans since 1914. Although with no specific orders indicating that the town need to be captured with any haste, the New Zealand soldiers were determined to and just before midday the first New Zealand troops reached the outer walls and scaled them with ladders. Propping the ladders against the precariously narrow inner walls, sections of one New Zealand battalion ascended the walls and engaged in hand-to-hand fighting with fleeing German defenders. The few thousand strong German garrison surrendered soon after New Zealand soldiers entered the town itself.
The infantry were relieved on the eastern side of the forest at midnight on 5–6 November and the war ended five days later. The division left the Third Army on 28 November, and marched through Belgium, to entrain at the German frontier for Cologne and take up billets in neighbouring towns as part of the army of occupation. Demobilisation soon started and at Mülheim near Cologne the division was finally disbanded on 25 March 1919.
The cost of maintaining the division for two and a half years on the Western Front was appalling. Altogether some 13,250 New Zealanders died of wounds or sickness as a direct result of this campaign, including 50 as prisoners of war and more than 700 at home. Another 35,000 were wounded, and 414 prisoners of war were ultimately repatriated. The total casualties therefrom approached 50,000, well over half the number of those who served in France or Belgium.
Other theatres[]
New Zealand also contributed to the war at sea, with the New Zealand Naval Forces being a division of the Royal Navy.[24] Immediately after the start of the war, the cruiser HMS Philomel, loaned to New Zealand as a training ship, was augmented with 70 New Zealand reservists and sailed with two Royal Navy cruisers to escort the New Zealand troops sent to occupy German Samoa.[25] Later in 1914 these three ships also escorted the New Zealand Expeditionary Force to Egypt.[26]
From January 1915, Philomel patrolled the Gulf of Alexandretta in the Eastern Mediterranean, supporting several landings and sustaining three fatal casualties, one being the first New Zealander killed in action in the war. She also took part in the defence of the Suez Canal, operations in the Gulf of Aden and patrols in the Persian Gulf.[27] Although refitting from time to time at Malta[28] or Bombay kept her seaworthy,[29] age eventually forced her out of the war and in March 1917 she returned to Wellington for a major overhaul.[30]
New Zealand was not subject to any significant direct military threat during the war. Although Germany had plans for naval raids on Australia and New Zealand, the threat from her Asiatic Squadron did not eventuate, as that force moved across the Pacific before being destroyed at the Battle of the Falkland Islands.
In June 1917, a German surface raider, the SMS Wolf entered New Zealand waters. She laid two small minefields in New Zealand waters and sank two merchant ships. One (the Port Kembla) off Farewell Spit, and another (the Wairuna) off the Kermadec Islands. Two fishing trawlers, the Nora Niven and Simplon, were fitted as minesweepers and took up sweeping duties in these areas. Another brief flurry of activity occurred when Felix von Luckner, imprisoned on Motuihe Island after being captured in the Society Islands, escaped and commandeered a small vessel before being recaptured in the Kermadec Islands.
New Zealand also contributed a wireless troop to the Mesopotamian Campaign. The Wireless Troop was formed in New Zealand and arrived at Basra in April 1916. In Mesopotamia the New Zealand troop was amalgamated with the 1st Australian Wireless Signal Squadron, forming "C" Wireless Troop of the Anzac Squadron. The troop was much affected by disease, but once in operation was attached to the Cavalry Division in the assault on Baghdad. The Wireless Troop was among the first batch of troops to enter the city on 11 March 1917. The Wireless Troop joined further operations in Mesopotamia and was then moved to Persia. In June 1917, the troop was redirected to France, where it was absorbed into the New Zealand Divisional Signal Company.
New Zealand had no air force of her own during the First World War but several hundred New Zealanders served with the Royal Flying Corps, the Royal Naval Air Service (RNAS) and the Royal Air Force. The first New Zealand flying ace of the war was Flight Lieutenant Thomas Culling, who flew with the RNAS. He was killed in June 1917, having shot down five aircraft.[31]
Recruiting and conscription[]
When the supply of volunteers for reinforcements for the New Zealand Expeditionary Force slowed, conscription was introduced, with the first ballot held in Wellington on 16 November 1916.[32] Men between 20 and 45 could be conscripted, subject to a medical check and limited rights of objection on conscience, family or business grounds.
Conscription was extended to Māori for the "Native Contingent" in late 1917, with the first "Māori ballot" for the Waikato district held in May 1918.[33] There was resistance in the Waikato (led by Princess Te Puea) to conscription. By the end of the war 552 Māori had been balloted, but no Māori conscripts had been sent overseas. And 2,227 Māori served in the war; about 4.5% of the Māori population or under half of the total contribution per head of the total New Zealand population. [34]
Hospitals[]

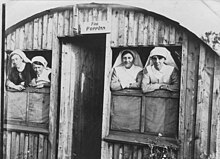
New Zealand Hospitals were set up at Port Said and Suez in 1915,[35] Walton-on-Thames in 1915,[36] and Amiens, Brockenhurst, Codford and Hornchurch in 1916. Hospital ships Maheno[35] and Marama[37][38] were converted in 1915.[35] Walton closed in 1919.[39]
Repatriation[]
Shortages of shipping, influenza[40] and strikes[41] were among causes[42] for delays in repatriating troops after the war. The frustration of the delay resulted in riots at Sling Camp in March 1919[41] and at Ismailia in July. Allied governments paid compensation for looted Egyptian shops.[40] New Zealand's share of the cost was £2,529[43] (2016 equivalent $250,000).[44]
Cemeteries and memorials[]
New Zealand war deaths are buried or commemorated in Commonwealth War Graves Commission (CWGC) cemeteries with other allied soldiers. Gallipoli dead are buried in 24 CWGC cemeteries in Turkey, and in CWGC cemeteries in Egypt, Gibraltar, Greece and Malta. There are memorials to the New Zealand missing on Chunuk Bair and at three CWGC cemeteries: Hill 60 Cemetery, Lone Pine Cemetery and Twelve Tree Copse Cemetery.[45]
On the Western Front missing New Zealand soldiers are commemorated in cemeteries near where they were lost rather than at the large memorials of Menin Gate and the Thiepval Memorial on the Somme. The New Zealand monuments to the missing are at Messines in Belgium and Armentierses, Longueval (Caterpillar Valley Cemetery), Grevillers, and Marfaux in France. There are four national battlefield memorials at Passchendaele, Messines, the Somme and Le Quesnoy.[46]
See also[]
- New Zealand Expeditionary Force
- Bere Ferrers rail accident in which ten NZEF soldiers died in 1917.
- SS Marquette troopship sunk 1915 with 32 New Zealanders including 10 nurses lost
- List of New Zealand soldiers executed during World War I
- Bulford Kiwi a memento to New Zealand soldiers who were stationed in Wiltshire.
References[]
Citations[]
- ^ "Governor's proclamation of war with Germany". The New Zealand Times. 6 August 1914.
- ^ "The voice of the people". The Dominion in Papers Past. 6 August 1914.
- ^ "New Zealand and the war". The Colonist in Papers Past. 6 August 1914.
- ^ Price, Mark (3 February 2009). "Dunedin family's pride as soldier honoured". Otago Daily Times. Retrieved 2 February 2009.
- ^ "Niuean war heroes marked". Western Leader. 21 May 2008. Retrieved 25 October 2011.
- ^ McGibbon 1991, p. 245.
- ^ Waite 1919, pp. 4–6.
- ^ McGibbon 1991, p. 248.
- ^ Smith 1924, p. 14.
- ^ Smith 1924, pp. 25–26.
- ^ Smith 1924, pp. 32–33.
- ^ Smith 1924, pp. 57–58.
- ^ Smith 1924, pp. 59–64.
- ^ Smith 1924, pp. 93–94.
- ^ McGibbon 2007, p. 65.
- ^ Smith 1924, pp. 130–131.
- ^ Bean 1941a, pp. 117–118.
- ^ McGibbon 2000, pp. 201–203.
- ^ Waite 1919, p. 47.
- ^ Waite 1919, pp. 53–55.
- ^ Sharpe, Maureen (1981). "Anzac Day in New Zealand, 1916–1939". The New Zealand Journal of History. 15 (2): 97–114. Retrieved 25 March 2017.
- ^ Harvey, Eveline (23 April 2008). "How the Herald reported the Gallipoli landings". The New Zealand Herald. Retrieved 25 March 2017.
- ^ Crawford & Buck 2020, pp. 1f,117.
- ^ McGibbon 2000, p. 353.
- ^ Hall-Thompson 1923, pp. 65–67.
- ^ Hall-Thompson 1923, pp. 67–68.
- ^ Hall-Thompson 1923, pp. 71–72.
- ^ Hall-Thompson 1923, pp. 69–70.
- ^ Hall-Thompson 1923, pp. 79–81.
- ^ Hall-Thompson 1923, p. 83.
- ^ Claasen 2017, pp. 259–269.
- ^ "Recruiting and Conscription". NZ History. New Zealand Government. Retrieved 19 November 2017.
- ^ "Māori objection to conscription". NZ History. New Zealand Government. Retrieved 19 November 2017.
- ^ Baker 1988, pp. 220,221.
- ^ Jump up to: a b c "NZANS History – 1915–1922". www.nzans.org. Retrieved 10 December 2016.
- ^ "New Zealand Hospitals in the United Kingdom". nzetc.victoria.ac.nz. Retrieved 10 December 2016.
- ^ "A vessel with a noble mission: the steamer Marama, New Zealand's second hospital ship, which left Wellington for the front last Saturday. (New Zealand Herald, 1915-12-08)". paperspast.natlib.govt.nz. National Library of New Zealand. Retrieved 10 December 2016.
- ^ "HOSPITAL SHIP MARAMA IMPERIAL CONFERENCE (North Otago Times, 1915-12-06)". paperspast.natlib.govt.nz. National Library of New Zealand. Retrieved 10 December 2016.
- ^ "WALTON-ON-THAMES. (New Zealand Herald, 1919-05-28)". paperspast.natlib.govt.nz. National Library of New Zealand. Retrieved 10 December 2016.
- ^ Jump up to: a b Woodfin, E (2012). Camp and Combat on the Sinai and Palestine Front: The Experience of the British Empire Soldier, 1916–18. Springer. ISBN 9781137264800.
- ^ Jump up to: a b "RIOT AT SLING CAMP. (Wanganui Herald, 1919-05-13)". paperspast.natlib.govt.nz National Library of New Zealand. Retrieved 18 February 2017.
- ^ "SHIPPING CONTROL MUDDLE. (Oamaru Mail, 1919-04-26)". paperspast.natlib.govt.nz National Library of New Zealand. Retrieved 18 February 2017.
- ^ "THE ESTIMATES (Waikato Times, 1920-11-12)". paperspast.natlib.govt.nz National Library of New Zealand. Retrieved 18 February 2017.
- ^ "Inflation calculator – Reserve Bank of New Zealand". www.rbnz.govt.nz. Retrieved 18 February 2017.
- ^ McGibbon 2004, pp. 16, 24, 26, 120.
- ^ McGibbon 2001, pp. 6, 16, 59.
Sources[]
- Baker, Paul (1988). King and Country Call: New Zealanders, Conscription and the Great War. Auckland, New Zealand: Auckland University Press. ISBN 1-86940-034-8.
- Claasen, Adam (2017). Fearless: The Extraordinary Untold Story of New Zealand's Great War Airmen. Auckland, New Zealand: Massey University Press. ISBN 978-0-9941407-8-4.
- Crawford, John; Buck, Matthew (2020). Phenomenal and Wicked: Attrition and Reinforcements in the New Zealand Expeditionary Force at Gallipoli. Wellington: New Zealand Defence Force. ISBN 978-0-478-34812-5."ebook". New Zealand Defence Force. 2020.
- Hall-Thompson, Captain P. (1923). "The Work of the Philomel". In Drew, Lieut. H. T. B. (ed.). The War Effort of New Zealand. Official History of New Zealand's Effort in the Great War. Auckland, New Zealand: Whitcombe and Tombs Limited. OCLC 2778918.
- McGibbon, Ian (1991). The Path to Gallipoli: Defending New Zealand 1840–1915. New Zealand: GP Books. ISBN 0-477-00026-6.
- McGibbon, Ian, ed. (2000). The Oxford Companion to New Zealand Military History. Auckland, New Zealand: Oxford University Press. ISBN 0-19-558376-0.
- McGibbon, Ian (2001). New Zealand Battlefields and Memorials of the Western Front. Auckland, New Zealand: Oxford University Press. ISBN 0-19-558444-9.
- McGibbon, Ian (2004). Gallipoli: A Guide to New Zealand Battlefields and Memorials. Auckland, New Zealand: Reed Books. ISBN 0-7900-0999-4.
- McGibbon, Ian (2007). "The Shaping of New Zealand's War Effort, August–October 1914". In Crawford, John; McGibbon, Ian (eds.). New Zealand's Great War: New Zealand, the Allies & the First World War. Auckland, New Zealand: Exisle Publishing. pp. 49–68. ISBN 978-0-908988-85-3.
- Smith, Stephen John (1924). The Samoa (N.Z.) Expeditionary Force 1914–1915. Wellington, New Zealand: Ferguson & Osborn. OCLC 8950668.
- Waite, Fred (1919). The New Zealanders at Gallipoli. Official History of New Zealand's Effort in the Great War. Auckland, New Zealand: Whitcombe & Tombs. OCLC 221448346.
External links[]
| Wikimedia Commons has media related to Military history of New Zealand during World War I. |
- Three e-books on WW1 in NZetc
- "ebook:Phenomenal and Wicked: Attrition and Reinforcements in the New Zealand Expeditionary Force at Gallipoli". New Zealand Defence Force. 2020.
- e-book Featherston Training Camp in Digger History
- e-book New Zealand at the Front (1917) in Digger History
- Letters and Papers of Cecil Malthus (digitised)
- New Zealand Mounted Rifles
- New Zealand and the First World War (NZHistory)
| Authority control: National libraries |
|---|
- New Zealand in World War I
- Wars involving New Zealand